
Most bare or dead patches in a lawn come down to six culprits: too much shade, compacted soil, poor drainage, nutrient-depleted or salty soil, pet urine, or too much foot traffic at the wrong time of year. In a lot of cases you can fix the underlying problem and get grass to grow. In others, especially under dense tree canopy or on heavily shaded side yards, the honest answer is that no grass variety will thrive long-term, and you'll save yourself years of frustration by switching to an alternative ground cover, mulch bed, or hardscape instead. This guide walks you through exactly how to tell the difference, fix what's fixable, and landscape beautifully when grass simply isn't the right plant for the job.
How to Landscape Areas Where Grass Won't Grow: Fixes
Marcus Volkmann
4 Aug 2026
Quick decision: can you actually grow grass here?
Before spending money on seed, sod, or amendments, run through these fast rules of thumb. They won't replace a full diagnosis, but they'll tell you quickly whether you're in fix-it territory or skip-to-alternatives territory.
- Sunlight: if the spot gets fewer than 2–3 hours of direct sun per day, no standard turf grass will establish reliably. Fine fescues are the most shade-tolerant cool-season option, but even they need at least 3 hours. Under dense tree canopy, plan for an alternative.
- Shade from trees: if tree roots are also competing for moisture and nutrients in addition to blocking sun, the challenge doubles. Groundcovers, mulch rings, or hardscape usually outperform grass here.
- Drainage: if water ponds on the surface for more than 24–48 hours after rain, grass will drown or develop root rot. You need drainage fixes first, or a rain garden/hardscape solution.
- Compaction: if a screwdriver won't penetrate more than 2–3 inches into dry soil, compaction is severe enough that seed won't establish without aeration and topsoil work.
- Soil depth: grass roots need at least 4–6 inches of workable topsoil. If you hit hardpan, clay pan, or rock at 2 inches, you'll need to import topsoil or go with raised beds and alternatives.
- Pet urine: high-traffic dog spots can be repaired, but if dogs use the same area repeatedly every single day, grass recovery becomes a constant maintenance cycle. Durable turf options and training strategies help, but a gravel or mulch zone may be more realistic.
- Traffic: high-foot-traffic corridors, like paths from a gate to a back door, will wear out any turf. Stepping stones, gravel, or pavers work better in these lines.
- Timing: if you're trying to establish cool-season grass in July heat or warm-season grass in October, failure is almost certain regardless of soil quality. Wait for the right window.
Diagnostic checklist: what's actually killing your grass
I always start a problem lawn assessment the same way: I walk the site at the same time two or three days in a row and take notes. It sounds obvious, but a lot of homeowners jump straight to a fix before they've actually identified the cause. Here's the structured checklist I use, based on the same framework Penn State Extension recommends for lawn establishment.
- Sunlight hours: count actual hours of direct sun the problem spot receives in a full day. Do this mid-season when trees are fully leafed out. Mark it as full sun (6+ hours), partial shade (3–6 hours), or dense shade (under 3 hours).
- Compaction: push a standard screwdriver into the soil with hand pressure. If it won't go past 2–3 inches, you have compaction. Also check for a hard, glazed surface layer, which can happen from foot traffic or repeated heavy rain on bare soil.
- Thatch: pull out a small plug of turf and measure the spongy brown layer between the green grass blades and the soil surface. More than half an inch of thatch and you have a dethatching job ahead of you.
- Drainage and ponding: watch the area during and after a normal rainfall. Does water sit on the surface for more than 24 hours? Does it drain to a low point but never really leave? Note where the water comes from and where it tries to go.
- Topsoil depth: use a probe or a long screwdriver to feel for hardpan, clay, gravel, or rock. Note the depth at which you hit resistance. Anything shallower than 4 inches is a problem for most grasses.
- Soil texture: grab a handful of moist soil and squeeze it. Sandy soil falls apart immediately and won't hold a ribbon. Loam holds a shape briefly. Clay holds a long, sticky ribbon. Each has different amendment and irrigation needs.
- Salinity or salt damage: look for white crusty deposits on the soil surface, yellowing or brown-tipped grass blades in patterns near driveways or roads, or turf that wilts even with adequate water. Salt-affected sites need lab confirmation before treatment.
- Pet urine: look for the classic pattern: a green outer ring of dark, lush growth surrounding a dead brown center. That's high-nitrogen burn from concentrated dog urine. It's distinct from drought stress or disease.
- Traffic patterns: look for worn, compacted paths where people or pets cut across the yard. The soil in these areas is almost always too compacted for seed germination.
- Existing pests or disease: check for grub damage (turf lifts like a loose carpet), fungal patches (brown circles, powdery coatings), or insect feeding patterns. Soil and timing fixes won't help if an active pest problem is present.
How to test your soil before doing anything else
A bag of lime, a bag of fertilizer, and a hope-for-the-best approach is the most expensive way to fix a problem lawn. A proper soil test, on the other hand, costs between $15 and $30 at most university extension labs and tells you exactly what your soil needs, and more importantly, what it doesn't need. I've seen homeowners dump lime on soil that was already alkaline and make things significantly worse. Don't guess.
How to collect a soil sample
UC ANR's soil-testing protocol recommends collecting 10 to 15 subsamples across the problem area, sampling to the typical turf root zone depth of 4 to 6 inches. Use a clean trowel or soil probe. Pull cores from different spots in the area, avoiding unusual spots like near a downspout or a well-worn path unless those are the specific problem areas. Mix all the subsamples together in a clean bucket, then pull about a cup of that mixed soil for your composite sample. Let it air dry slightly, bag it, and send it to your state university extension lab or a reputable private lab.
What to look for in your results
A complete lawn soil test should report pH, buffer pH (which labs use to calculate the correct lime rate, not just a blanket application), extractable phosphorus and potassium, organic matter percentage, and ideally an electrical conductivity (EC) reading if you suspect salinity. The buffer pH is particularly important because it accounts for your soil's buffering capacity, meaning two soils at the same pH may need very different amounts of lime to correct. If your EC reading is elevated or you see salt-damage symptoms, ask the lab to also report sodium adsorption ratio (SAR) or exchangeable sodium percentage (ESP), because saline soils and sodic soils require completely different treatments. Colorado State University Extension is clear on this: lumping them together and guessing at a remedy is a waste of time and money.
Quick texture and compaction checks you can do at home
For texture, the ribbon test works well enough for most homeowners: moisten a handful of soil and try to form a ribbon between your thumb and fingers. Sandy soil won't form any ribbon. Loam forms a short, crumbly ribbon. Clay forms a long, smooth ribbon. This gives you a useful starting point for irrigation and amendment decisions. For compaction, a penetrometer (available at garden centers for around $15–$30) gives a more reliable reading than the screwdriver test, measuring in PSI. Root penetration becomes difficult around 300 PSI and near-impossible above 400 PSI. For drainage, dig a hole about 12 inches deep, fill it with water, let it drain, then refill and measure how fast the second fill drains. If it drops less than 1 inch per hour, you have a drainage problem worth addressing.
Fixing the soil: amendments, aeration, and drainage
Once you have your soil test results in hand, you can actually fix things in the right order. Trying to aerate compacted soil before addressing pH, or adding topsoil before correcting drainage, usually means doing the work twice.
Correcting pH
Most grasses perform best in a pH range of 6.0 to 7.0. If your soil test shows low pH (acidic), lime is the fix. Penn State Extension is specific: do not apply more than 100 lb of agricultural limestone per 1,000 square feet in a single application on established turf. If the lab recommendation exceeds that, split applications several months apart. For new-lawn preparation where you can till, you can incorporate larger amounts before seeding. If pH is too high (alkaline), elemental sulfur is the standard amendment. Rates vary significantly by soil texture and starting pH, and microbial conversion to sulfuric acid takes weeks to months, so this isn't a fast fix. Rutgers extension recommends not applying more than 5 lb of elemental sulfur per 1,000 square feet in a single spot application without local lab guidance.
Dealing with salt-affected soil
Saline soil (high soluble salts) and sodic soil (high exchangeable sodium) look similar on the surface but require different fixes. Saline soil is treated by leaching with good-quality water, provided drainage is adequate. Sodic soil requires gypsum (calcium sulfate) to displace the sodium from soil particles, followed by leaching to wash the displaced sodium out. Gypsum only works when you have adequate drainage and water supply for leaching. The USDA NRCS is explicit that gypsum rates should be calculated from actual lab data (SAR or ESP), not estimated.
Aeration and dethatching
Core aeration is the right tool for compaction. Hollow-tine aerators pull plugs that are typically 2 to 4 inches deep and about half to three-quarters of an inch in diameter, spaced 2 to 6 inches apart. University of Maryland Extension recommends aerating when turf is in active growth: early fall for cool-season lawns, late spring for warm-season. Heavily trafficked areas may need annual aeration; typical lawns can go every 2 to 3 years. If thatch exceeds half an inch, dethatch before or alongside aeration. Power dethatching (vertical mowing) is aggressive and should only be done when the grass is actively growing so it can recover. Trying to dethatch stressed or dormant turf causes more harm than good.
Adding topsoil and compost
For new lawn areas where topsoil depth is less than 4 to 6 inches, import screened topsoil to bring the root zone to depth before seeding or sodding. Penn State Extension recommends a minimum of 4 to 6 inches of screened topsoil over prepared subgrade for new lawn establishment. For existing lawns, light topdressing after aeration is the evidence-based approach: WSU extension recommends about a quarter to half an inch of screened, finished compost per pass, roughly 0.8 to 1.6 cubic yards per 1,000 square feet. Work it into the aeration holes with the back of a rake. Heavier compost incorporation (2 to 4 inches) is for new lawn builds and must be tilled in before seeding.
Practical drainage fixes
For low spots that collect water, the simplest fix is regrading to direct water away from the problem area and toward a drainage outlet. For consistently wet areas, a French drain (a perforated pipe in a gravel-filled trench) can redirect subsurface water. If your site has a natural low point with nowhere for water to go, consider converting it to a rain garden planted with water-tolerant natives instead of fighting it with turf. For side yards that receive roof runoff from downspouts, extending downspouts away from the area or installing a dry creek bed can dramatically reduce the waterlogging that kills grass.
When and how to rescue the lawn: timing, seed, and sod
Even after fixing the soil, planting at the wrong time is one of the most common reasons grass fails to establish. Soil temperature matters more than calendar date, especially in transition zones where fall can arrive late or spring can be unpredictable.
Timing your planting
For cool-season grasses (tall fescue, Kentucky bluegrass, fine fescues), early fall is the best overseeding and establishment window. Extension guidance recommends timing overseeding by soil temperature: cool‑season turf is best in early fall, while warm‑season grasses should be seeded when soil temperatures consistently reach about 65–70°F When to Overseed Your Lawn — soil‑temperature (extension‑backed) guidance. Soil is still warm enough for germination, air temperatures are cooling, and competition from weeds is lower than in spring. For warm-season grasses (Bermuda, zoysia, centipede), wait until soil temperatures consistently reach 65 to 70 degrees Fahrenheit, which typically means late spring to early summer. Seeding in summer heat without irrigation support or in fall without enough time to establish before frost are both recipes for failure.
Overseeding rates
University of Maryland Extension provides these standard overseeding rates as a useful benchmark: tall fescue at about 4 lb per 1,000 square feet, Kentucky bluegrass at 1 to 1.5 lb per 1,000 square feet, and fine fescues at 2.5 to 3 lb per 1,000 square feet. Always check the specific seed bag label for pure live seed (PLS) percentages and adjust accordingly, especially when using blends.
Seed vs. sod: which one to choose
Both seed and sod can work, but the right choice depends on your situation, not personal preference. Here's a practical comparison based on Penn State Extension guidance and current market costs. Seeding is lowest cost and offers broader cultivar choice but requires the longest establishment window (weeks–months of careful watering and weed control); sod provides instant cover and erosion control and usually roots in 2–6 weeks but costs several times more per ft² and has limited cultivar availability, choose sod when erosion control or immediate use is required Lawn Establishment — Penn State Extension.
| Factor | Seeding | Sodding |
|---|---|---|
| Cost (materials) | Under $0.25/ft² for seed alone | Roughly $1–$2.60/ft² installed, varies by region |
| Establishment time | Weeks to months; full establishment can take a full season | 2–6 weeks to root in; usable in days |
| Cultivar options | Broad: many improved varieties available | Limited to what sod farms grow |
| Erosion control | Poor until established; needs erosion blanket on slopes | Immediate cover and erosion control |
| Best use case | Large flat areas, budget projects, specific cultivar needs | High-visibility areas, slopes, immediate-use needs |
| Weed competition risk | Higher; bare soil invites weeds during germination | Lower; dense sod suppresses most weeds |
| Timing flexibility | Must match soil temperature windows closely | Slightly more flexible but still needs active-growth periods |
My rule of thumb: seed for budget and variety, sod for speed and slopes. If you have a client or homeowner who wants to use the lawn in 30 days, sod is the only realistic option. If cost is the priority and the area is flat and can be protected from traffic for a season, seed is the better investment.
Stepwise lawn recovery plan
- Collect soil samples and submit for testing. Allow 1–2 weeks for results.
- Address pH, salinity, or nutrient issues per lab recommendations.
- Correct drainage and grade problems before any seeding.
- Aerate heavily compacted areas. Dethatch if thatch exceeds half an inch.
- Topdress with screened compost (quarter to half inch) and work into aeration holes.
- Add topsoil if root zone is shallower than 4–6 inches.
- Seed or sod at the appropriate soil-temperature window for your grass type.
- Water consistently: light, frequent irrigation for seed germination (keep top inch moist); deeper, less frequent watering once established.
- Keep traffic off the area until grass has rooted and can handle mowing.
- Overseed thin spots in the following appropriate-season window.
Best grass types for tough spots
Not all grass varieties handle difficult conditions equally. Matching the right species to your conditions is at least as important as soil prep. I've seen beautifully amended soil fail because someone planted Kentucky bluegrass in a partly shaded high-traffic area instead of a durable tall fescue blend.
| Grass Type | Best For | Shade Tolerance | Drought Tolerance | Wear/Traffic Tolerance | Notes |
|---|---|---|---|---|---|
| Fine fescues (creeping red, chewings, hard) | Shaded, low-maintenance areas | High (best cool-season option for shade) | Moderate to good | Low to moderate | UMass Extension identifies fine fescues as best cool-season performers in limited light; not for heavy traffic |
| Tall fescue | Moderate shade, drought, general tough spots | Moderate | Good (deep roots) | Good | Most resilient cool-season option for combined shade and drought stress; widely adaptable |
| Kentucky bluegrass | Full sun, moderate traffic, cold climates | Low | Moderate | Good (self-repairs) | Needs at least 6 hours sun; poor choice for shaded areas |
| Bermudagrass | Full sun, high traffic, warm climates | Very low | Excellent | Excellent | Aggressive spreader; terrible in shade; best warm-season wear-resistant option |
| Zoysiagrass | Full sun to light shade, moderate traffic | Low to moderate | Good | Good | Slower to establish than Bermuda; handles light shade better |
| Centipedegrass | Low-maintenance, acidic soils, Southeast | Low | Moderate | Low to moderate | Not for heavy traffic; sensitive to overwatering and excess fertilizer |
| St. Augustinegrass | Shade, warm coastal climates | Best warm-season shade tolerance | Moderate | Moderate | Most shade-tolerant warm-season grass; not cold-hardy above USDA Zone 8 |
For shaded cool-season lawns, start with a quality fine fescue blend or a fine fescue/tall fescue mix. For shaded warm-season lawns in the South, St. Augustinegrass is usually the best available option. But remember: UMass Extension's research is clear that no turf grass thrives in dense shade under 2 to 3 hours of direct sun per day, regardless of variety. At that point, you're managing a losing battle unless you can prune trees to increase light.
Pet-specific strategies: dogs, urine, and durable turf
Pet-related lawn damage is one of the most frustrating and persistent problems I hear about from homeowners, particularly dog urine burns. The good news is that it's manageable with the right combination of turf choice, training, and spot repair. For step-by-step methods for maintaining turf in shaded yards used by dogs, see our guide on how to grow grass in shade with dogs. The bad news is there's no single magic product that fully solves it, despite what some retailers suggest.
Why dog urine kills grass
Dog urine is high in nitrogen and salts. In small amounts, nitrogen is actually beneficial, which is why you see that dark green outer ring around urine spots. In concentrated amounts, it creates nitrogen burn and salt stress that kills the grass in the center. Learn more about why grass won't grow where dog urinates. Female dogs tend to cause more visible damage because they squat and concentrate their urine in one spot, while male dogs typically mark smaller amounts on vertical surfaces.
Prevention and training
The most effective long-term solution is training dogs to urinate in a designated area, ideally one with gravel, mulch, or artificial turf. This is genuinely the most sustainable fix. For dogs that already have established habits on the lawn, retraining takes consistency but is achievable. Flushing urine spots immediately with water after the dog goes will dilute the nitrogen and salts enough to prevent burn in many cases. This works best if you catch it within 8 hours.
Urine neutralizers and supplements
Products marketed as dog-urine neutralizers for lawns, typically applied as sprays to the soil, aim to neutralize acidity or dilute salts. Results are mixed. Soil amendments like lime can help if the soil has become acidic from repeated urine exposure, but this should be verified with a soil test rather than assumed. Dog dietary supplements that claim to reduce nitrogen in urine have limited peer-reviewed evidence behind them and should only be used under veterinary guidance.
Spot repair for urine burns
- Flush the burned area heavily with water to leach salts from the root zone.
- Rake out dead grass to expose bare soil.
- If soil EC is high from repeated urine exposure, apply gypsum per soil-test guidance to help displace sodium, combined with further leaching.
- Reseed with a wear- and stress-tolerant variety: tall fescue is a good choice for cool-season areas.
- Keep the dog off the reseeded area until grass is established (at least 3–4 weeks for germination plus another 2–3 weeks of root development).
- Repeat as needed, or designate a dog area with a more durable surface.
Most durable turf options for dog owners
For cool-season lawns, tall fescue is the most practical choice: deep roots, good wear tolerance, and reasonable recovery from urine stress. For warm-season lawns, Bermudagrass handles traffic and physical wear best but still burns from concentrated urine. Some homeowners in the South use hybrid Bermudagrass varieties for their rapid recovery rate. Artificial turf is the ultimate low-maintenance solution for dedicated dog areas, though it requires proper drainage installation (perforated backing or gravel base) to manage urine and odor, and it needs periodic rinsing. You can also explore the broader topic of how to grow grass where dogs pee, or look into grass-growing solutions specifically for shade areas with dog activity, since the two challenges often overlap.
Alternatives to grass: what to use when turf won't work
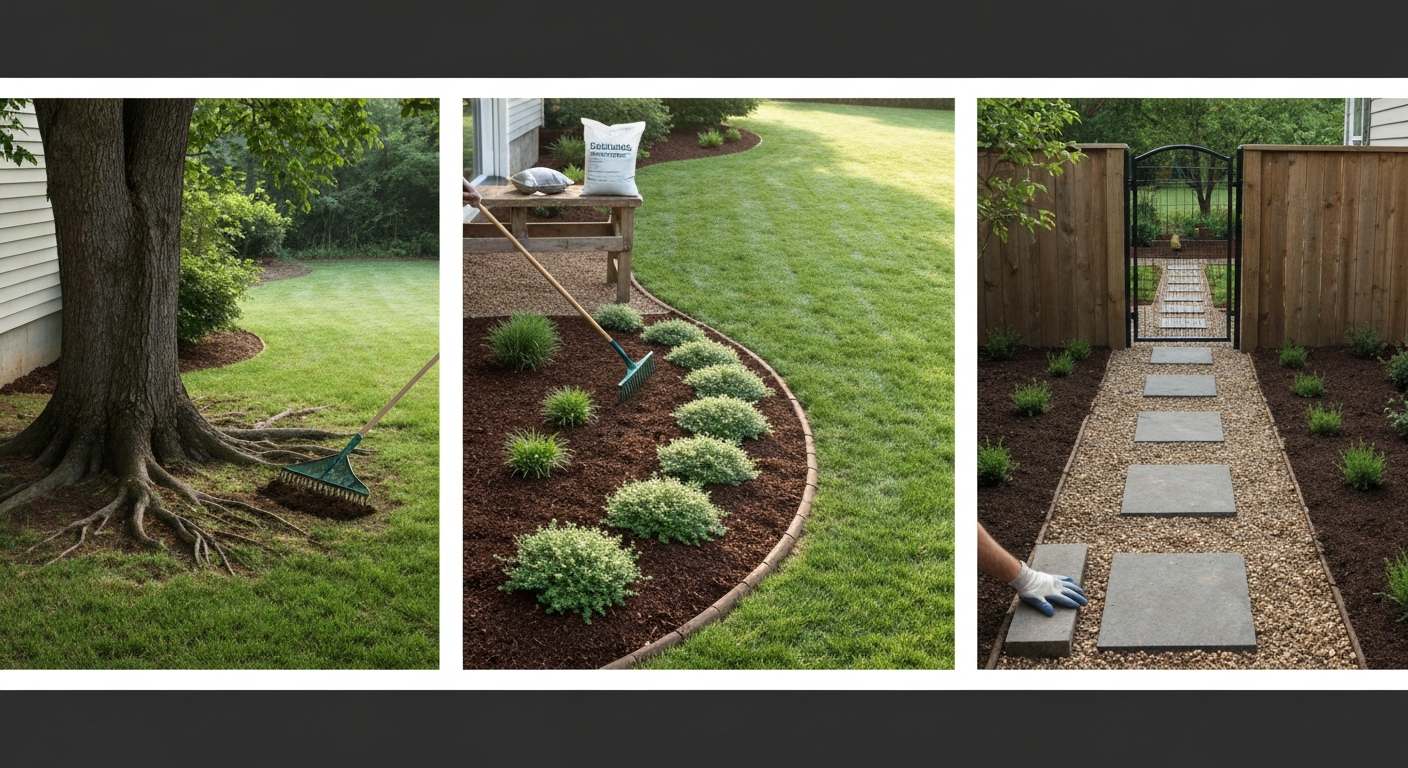
I want to be straight with you here: sometimes the right answer is not more grass. Dense shade, heavy foot traffic corridors, very shallow soil over hardpan, or chronic drainage problems are situations where fighting for turf is a losing, expensive battle. For inspiration, see our gallery of backyard ideas where grass won't grow for practical, attractive options tailored to shady, wet, or high-traffic spots. There are genuinely attractive and low-maintenance alternatives, and committing to one of them is not giving up, it's smart landscaping.
Mulch beds
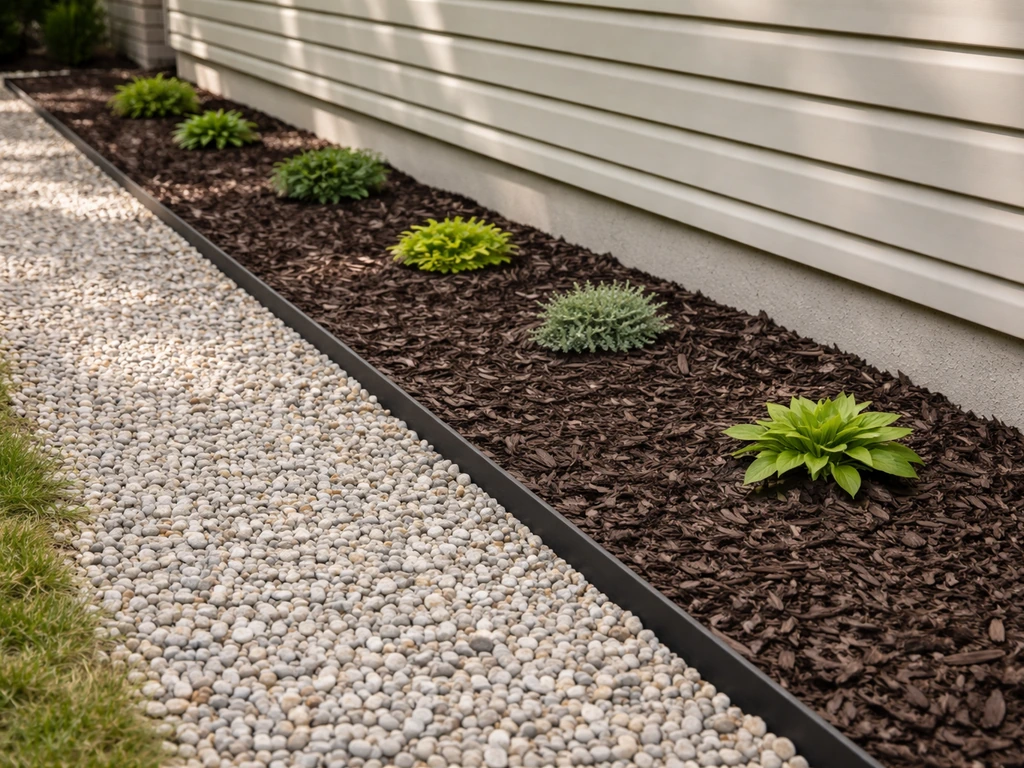
Shredded bark or wood chip mulch is the most common solution under trees and in shaded side yards. A 2 to 3 inch layer suppresses weeds, retains moisture, insulates roots, and looks clean with minimal maintenance. Avoid piling mulch against tree trunks (the classic 'mulch volcano'), which invites disease and rot. Refresh the top layer annually as it breaks down. Wood chip mulch decomposes over time and improves soil structure, making it a soil-building choice as well as a cosmetic one.
Gravel and decomposed granite
Gravel and decomposed granite (DG) are excellent for high-traffic areas, side yards, and dog runs. They drain well, handle foot traffic without compacting (unlike soil), and require minimal maintenance once installed. Install landscape fabric under gravel to suppress weeds, though fabric eventually degrades and may need replacing after 5 to 10 years. Pea gravel works well for dog areas because it's gentle on paws and easy to hose down. DG compacts enough to walk on comfortably but doesn't become muddy.
Pavers, stepping stones, and paths
High-traffic corridors, like the line from a gate to a back door, almost always do better with stepping stones or a paved path than repeated grass repair. Concrete pavers, flagstone, and natural stepping stones are all good options. Leave gaps between pavers and fill with creeping thyme, Irish moss, or other low groundcovers for a softer aesthetic that handles foot traffic better than grass.
Groundcovers other than grass
For shaded areas under trees or along fence lines where grass fails, low-growing groundcovers often perform far better. Creeping phlox, hostas, ajuga, and pachysandra all handle shade well and spread to cover bare ground. Clover (white Dutch clover in particular) is nitrogen-fixing, handles light foot traffic, stays green with less water than most grasses, and tolerates moderate shade. Moss is a beautiful option in very moist, acidic, shaded environments and essentially maintains itself once established. Native groundcovers are increasingly popular and typically require minimal inputs once established because they're adapted to local soil and climate conditions. If you're weighing all of these options more broadly, exploring what to grow instead of grass gives a deeper look at species selection by region and condition.
Rain gardens and dry creek beds
Consistently wet or low areas where grass rots out are prime candidates for rain gardens or dry creek beds. A rain garden is a planted depression designed to collect and infiltrate stormwater, planted with water-tolerant native plants. It turns a drainage problem into a landscape feature. A dry creek bed is a gravel-filled swale that channels water visibly during rain events and looks like a decorative rock feature when dry. Both are far more attractive and functional in chronic wet spots than dead or diseased turf.
Pros, cons, and cost comparison for main alternatives
| Alternative | Pros | Cons | Approx. Cost | Best For |
|---|---|---|---|---|
| Mulch (bark/wood chips) | Low cost, improves soil, suppresses weeds, looks clean | Needs annual refresh, can attract termites near foundations | $30–$60/cu yd delivered | Tree rings, shaded beds, side yards |
| Gravel/decomposed granite | Durable, drains well, low maintenance, dog-friendly | Hot in full sun, can migrate, fabric degrades | $50–$150/ton installed | Side yards, dog runs, dry climates |
| Pavers/flagstone | Extremely durable, high aesthetic value, nearly zero maintenance | High upfront cost, requires proper base installation | $10–$30/sq ft installed | Paths, patios, high-traffic corridors |
| Artificial turf | Always green, low maintenance, handles pets well | High upfront cost, hot in sun, needs drainage base, 10–15 yr lifespan | $8–$20/sq ft installed | Dog areas, high-traffic patches, difficult turf spots |
| Native groundcovers/clover | Low inputs once established, ecologically beneficial, handles shade/drought | Takes time to fill in, may need weed suppression initially | $1–$4/sq ft planted | Shaded areas, naturalized spaces, low-traffic zones |
| Moss | No mowing, no fertilizer, thrives in shade and moisture | Only works in right conditions (moist, acidic, shaded) | Low to free (transplant) | Dense shade, moist acidic slopes, woodland gardens |
| Rain garden | Solves drainage problem, supports pollinators, low maintenance | Requires design and proper plant selection, takes a season to establish | $5–$15/sq ft depending on complexity | Chronically wet low spots, downspout outlets |
Special situations: side yards, sandy soil, and other challenging spots
Side yards deserve their own mention because they combine almost every difficult condition at once: limited sunlight, poor air circulation, foot traffic, roof runoff, and often the most neglected soil on the property. The same diagnostic checklist applies, but in side yards I almost always find that alternatives outperform grass unless the space is at least 6 feet wide with reasonable sun exposure. Mulch with shade-tolerant groundcovers, gravel, or a simple paver path are usually the most practical and attractive solutions. There are dedicated ideas for side-of-house areas where grass won't grow worth exploring if that's your specific challenge. See our additional ideas for side-of-house areas where grass won't grow for practical options like mulch beds, gravel, pavers, and shade-tolerant groundcovers. For more options and planting ideas, see ideas for shady areas where grass won't grow. For targeted solutions, see ideas for areas where grass won't grow.
Sandy soil is a different problem. It drains too fast, holds almost no nutrients, and dries out between waterings quickly enough to stress grass. The fix is organic matter: repeated compost topdressing (quarter to half an inch per application, 2 to 3 times per year) gradually improves water and nutrient retention. Drought-tolerant grass varieties like tall fescue, Bermudagrass, or zoysiagrass are better starting choices than water-hungry options like Kentucky bluegrass. You may also need more frequent, shorter irrigation cycles until organic matter levels improve.
Implementation checklist and realistic timeline
I get asked a lot: how long is this actually going to take? The honest answer depends on the severity of the problem and what fix you're pursuing. Here's a realistic breakdown.
| Task | When to Do It | Timeline to Complete |
|---|---|---|
| Soil test collection and submission | Anytime; ideally 6–8 weeks before planting | 1–2 weeks for results |
| Drainage grading and French drain installation | Before any planting | 1–3 days (DIY) to 1 week (contractor) |
| pH correction (liming or sulfur) | Per lab recommendations; split applications if needed | Lime: 2–3 months for full effect; sulfur: 2–6 months |
| Aeration and dethatching | Active growth period for your grass type | 1 day; annual or biennial |
| Compost topdressing | After aeration, same season | Half day; repeat 2–3x per year |
| Topsoil import and grading (new lawn areas) | Before seeding/sodding | 1–3 days depending on area size |
| Seeding (cool-season grasses) | Early fall (soil temp still warm, air cooling) | Germination in 1–3 weeks; usable in 6–10 weeks |
| Seeding (warm-season grasses) | Late spring to early summer (soil 65–70°F+) | Germination in 1–3 weeks; usable in 6–12 weeks |
| Sodding | Anytime in active growth season | Rooted in 2–6 weeks; usable almost immediately |
| Alternative groundcover installation | Spring or fall for most plants | Plants establish in 1 full season; fills in over 1–2 years |
| Mulch bed or gravel installation | Anytime | 1 day to 1 week; ready immediately |
The biggest mistake I see is rushing seeding before the soil and timing conditions are actually right. A lawn that takes two seasons to establish because the work was done properly will outperform one thrown down three times in a row because the fundamentals were skipped. Take the time to diagnose, fix the real problem, and plant at the right moment. And if the honest answer from your diagnostic checklist is that this spot isn't suited for grass, pick one of the alternatives above and commit to it. A well-designed mulch bed, gravel path, or native groundcover area looks intentional and attractive, while an eternally struggling patch of turf just looks like a problem.
FAQ
What is the first step to diagnose why grass won’t grow in an area?
Start a structured site assessment: record daily sunlight hours (direct and filtered), note visible compaction or thatch, observe surface drainage/ponding after rain, identify existing turf species and any pest/disease symptoms, and measure topsoil/root‑zone depth. These factors—light, water, nutrients, compaction, and species adaptation—are the most common causes of failure.
How do I perform a proper soil test for a troubled lawn area?
Collect 10–15 subsamples across the problem area, sample to the turf root zone (commonly 4–6 inches), mix into one composite sample, and submit to a university or reputable lab. Request pH, buffer pH (lime need), extractable P and K, organic matter, and electrical conductivity (EC)/soluble salts if salinity is suspected. Follow the lab’s recommended amendments rather than guessing.
How do I interpret and act on common soil test results (pH, salts, nutrients)?
If pH is low, follow lab lime rates—do not exceed local single‑application limits (e.g., 100 lb/1,000 ft² for established turf); split large lime applications. If pH is high, apply elemental sulfur per extension tables and allow months for microbial conversion. If EC or salt symptoms exist, determine whether soil is saline or sodic and follow lab/extension guidance: gypsum plus adequate leaching is needed for sodic soils, while saline soils may require freshwater leaching and salt‑tolerant species. Correct nutrient deficits per the lab recommendation and retest after corrections.
What mechanical soil fixes actually help when compaction or thatch is the problem?
Core (hollow‑tine) aeration is preferred: plug depth ~2–4 inches, plugs spaced 2–6 inches apart. Aerate when turf is actively growing (fall for cool‑season turf). Dethatch if thatch exceeds ~1/2 inch using a power dethatcher or vertical mower during active growth so turf can recover. After aeration, topdress lightly with screened compost (≈0.25–0.5 inch) to improve organic matter and structure.
When should I add topsoil or do a full rebuild of the root zone?
If topsoil/root zone is shallow (<4 inches), or underlying material is poor (rocky, heavy clay, contaminated, or saline), plan a soil rebuild: remove problem material if needed, import screened topsoil and blend until you have 4–6 inches of good root zone, correct pH and drainage first, then seed or sod. Heavier incorporation (2–4 inches of soil/compost) is for new‑lawn construction and should be tilled in prior to establishment.
Which grass species work best in low‑light or drought-prone problem areas?
For shaded cool‑season sites, fine‑leaf fescues (creeping red, chewings, hard fescue) perform best in limited light; tall fescue tolerates moderate shade and drought better than many cool‑season grasses. For warm‑season lawns, select shade‑tolerant bermudagrass or zoysiagrass cultivars in areas with some sun. Note: no turf thrives in deep shade (<2–3 hours direct sun/day); consider alternatives for dense shade.
Next Articles
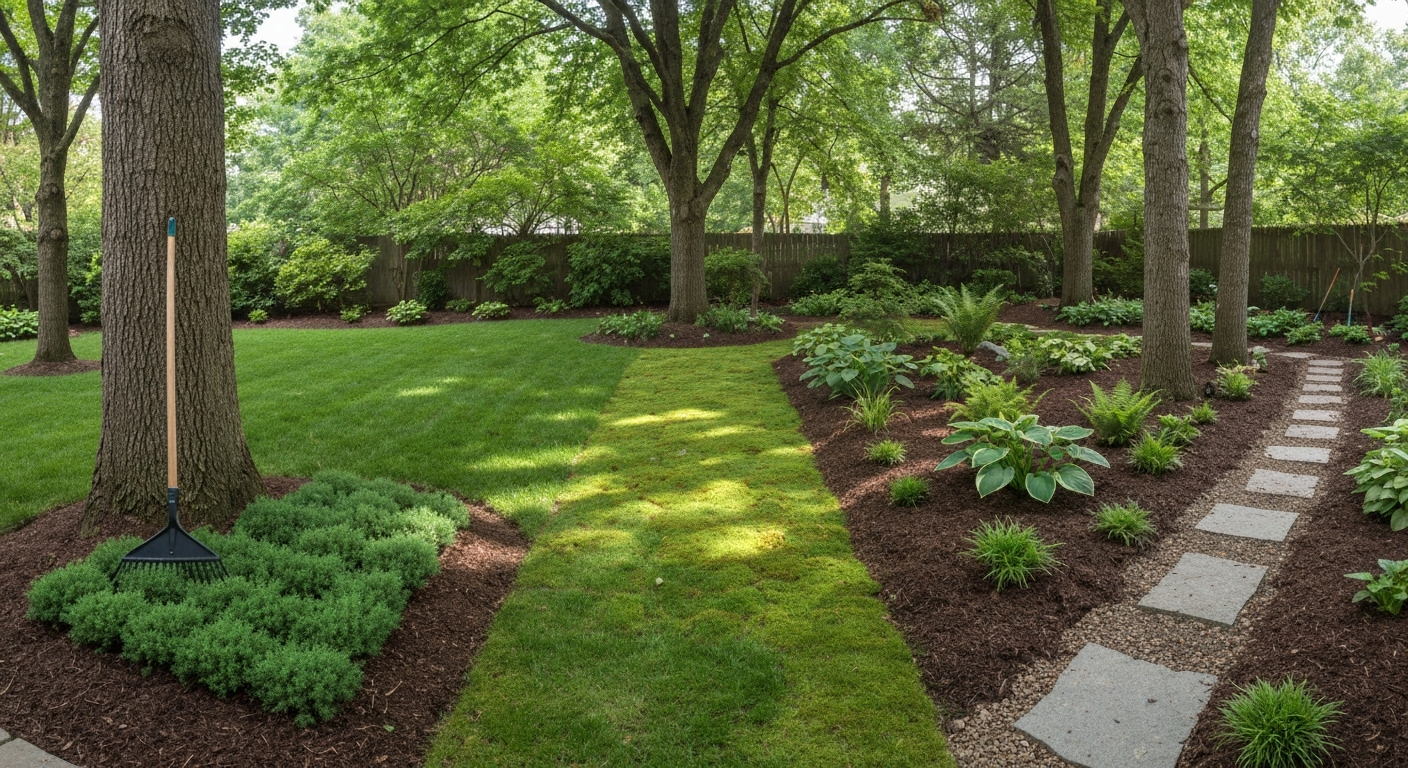
Ideas for Shady Areas Where Grass Won’t Grow: Solutions
Solutions for shady spots where grass won’t grow, diagnose causes, choose groundcovers, moss, pavers, or turf.
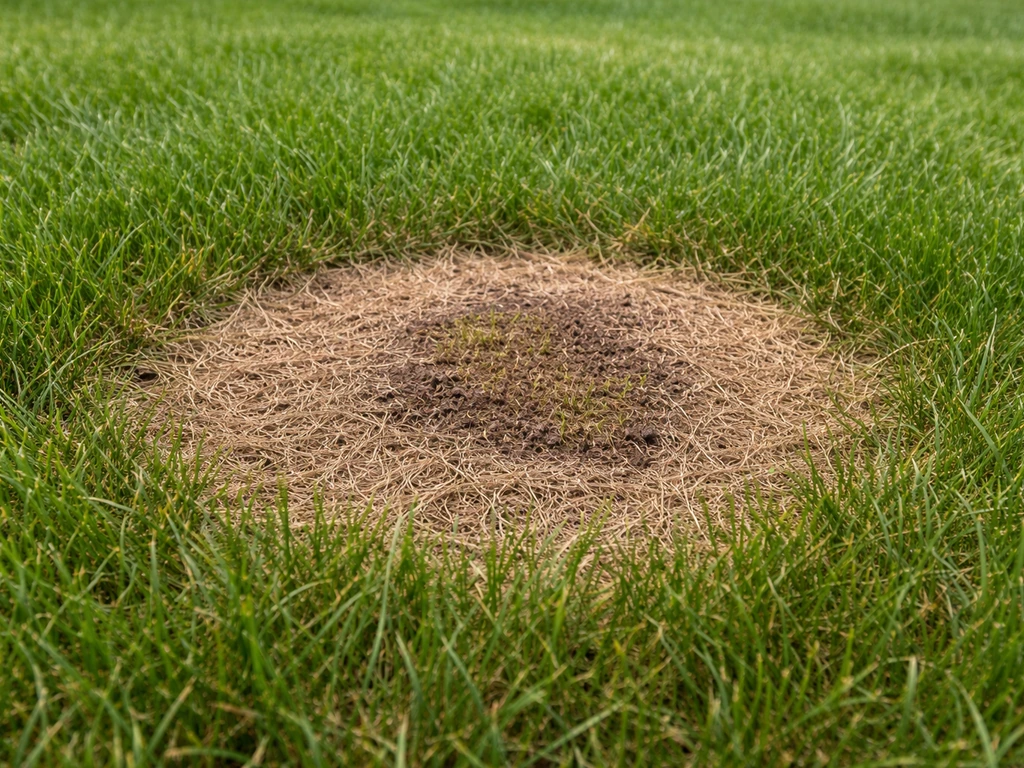
Grass Won’t Grow Where Dog Urinates: Fix Fast and Prevent It
Learn why dog urine burns grass and follow step-by-step fixes and prevention to stop dead patches and re-grow.
Ideas for Side of House Where Grass Won’t Grow
Fix side-yard grass: learn why it fails, then install gravel, mulch, pavers, groundcovers, or turf with proper prep and