Sod cannot grow directly on bare concrete. Grass roots need a penetrable, moist growing medium to colonize, and a solid concrete slab gives them nowhere to go. That said, you can absolutely grow sod over concrete if you engineer the right rootzone on top of it, but that means treating it as a structural project, not a weekend lawn job. For gravel, rock, compacted soil, and existing grass, the news is more encouraging: with the right prep and enough soil depth, sod can establish on all of those surfaces.
Can Sod Grow on Concrete? Feasibility, Methods & Checklist
Marcus Volkmann
17 Jul 2026
Quick verdict: concrete, gravel, rock, hard ground, and existing grass
Here is the bottom line for every surface this question covers. Concrete with no soil on top: sod will not root and will die within weeks. Concrete with an engineered rootzone installed: sod can establish, but structural and waterproofing work is required first. Gravel or crushed rock: sod can grow with a minimum of 4 inches of quality topsoil placed on top and proper drainage managed through the gravel base. Rocky ground: possible with rock removal, soil importation, and erosion control, but labor-intensive. Compacted or hard ground: very achievable once you break compaction and amend the soil. For more detail on whether sod can grow on hard ground, see the full guide can sod grow on hard ground. Sod on top of existing live grass: generally fails unless the existing turf is dead, extremely thin, or properly scarified, full removal is the most reliable approach.
How sod actually establishes, the biology you need to understand
When sod is harvested at the farm it comes with roughly a quarter to half an inch of soil still attached to the roots. That thin factory layer keeps the plant alive in transit but it is nowhere near enough to sustain a lawn permanently. Within the first 7 to 14 days after installation, the grass sends new roots downward into the underlying soil. By 2 to 4 weeks those roots should be anchoring firmly enough that a gentle tug will not lift the mat, that is the classic 'tug test' installers use on the job.
For that rooting sequence to work, three things must be present simultaneously. First, the sod must make direct physical contact with a moist, firm but loose receiving soil, even a thin air gap between the sod mat and the surface below is enough to stall root development entirely. Second, the receiving medium must be penetrable. Concrete, compacted hardpan, and dense clay all resist root entry to varying degrees. Third, there needs to be adequate drainage. Roots sitting in waterlogged soil suffocate quickly because oxygen is displaced; most turfgrass species are surprisingly intolerant of saturated conditions beyond a few days.
Root depth matters for long-term survival too. Perennial ryegrass and Kentucky bluegrass typically root to about 6 to 12 inches under normal conditions. Tall fescue, a deeper feeder, can push 18 to 48 inches in good soil. Warm-season grasses like bermudagrass and zoysia are the champions, reaching 18 to 96 inches in favorable conditions. What this tells you practically is that the thinner your available rooting depth, the more drought-sensitive and fragile your lawn will be, and that matters enormously when you are building a rootzone over an impermeable surface.
Feasibility at a glance by surface type
| Surface | Can Sod Grow? | Minimum Prep Required | Difficulty |
|---|---|---|---|
| Bare concrete (no added soil) | No — roots cannot penetrate | Full engineered rootzone assembly required | Very High |
| Concrete with engineered rootzone | Yes — with proper assembly | Waterproofing, drainage layer, 4–6 in lightweight rootzone, structural check | High |
| Gravel or crushed rock | Yes — with soil overlay | 4–6 in quality topsoil over graded gravel base | Moderate |
| Rocky ground (in-ground) | Yes — with rock clearing and soil import | Rock removal or soil pockets, imported topsoil to 4–6 in depth | Moderate–High |
| Compacted / hard ground | Yes — after decompaction | Tilling or aerating 4–6 in, soil amendments, grade correction | Moderate |
| Existing live grass | Rarely — mostly fails | Full kill and removal preferred; scarification if grass is very thin | Moderate |
Installing sod on concrete: the realistic way to do it
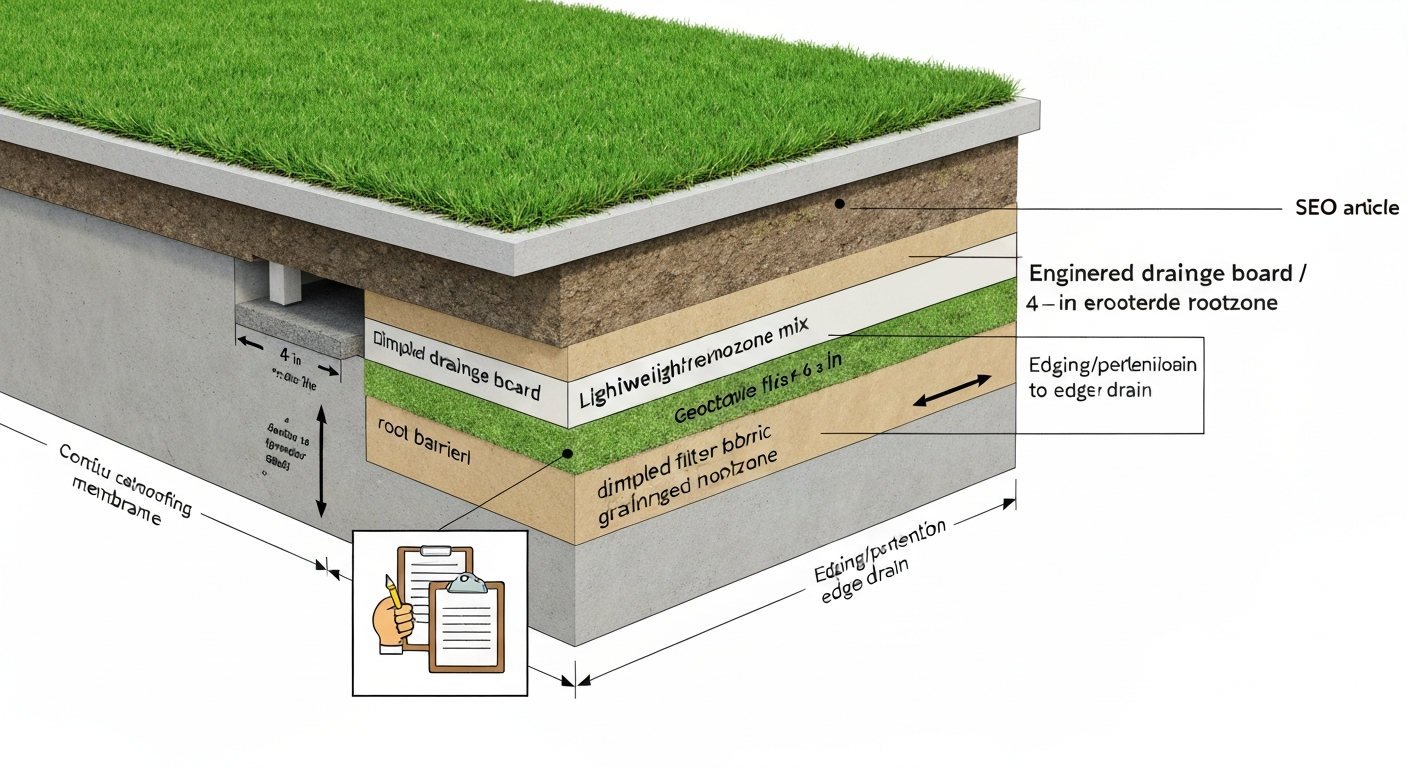
Installing a living lawn over a concrete slab is essentially a green-roof project, and that label matters because it changes how you think about the work. Green-roof practice calls for a layered assembly rather than simply piling soil on the slab. Skipping any of these layers is how projects fail within a season, usually with expensive consequences for the slab underneath.
Structural check first, this is non-negotiable
Before you buy a single roll of sod, determine whether the concrete structure can carry the added weight. Typical residential decks and roofs are designed for a minimum live load of around 40 lb per square foot under the International Residential Code. Saturated soil adds dead load on top of that. A lightweight extensive green-roof system with 2 to 3 inches of substrate weighs roughly 15 to 30 lb per square foot when saturated. The FHWA guidance notes typical saturated bulk densities vary with texture and organic matter (roughly 110–130 lb/ft³ for topsoil), which engineers convert to lb/ft² by multiplying by depth (for example, 4 inches of saturated topsoil ≈ 37–43 lb/ft²) blank" rel="noopener noreferrer">Soils & Foundations Reference (FHWA NHI) — saturated unit weight concepts. Step up to 4 to 6 inches of substrate and you are looking at 30 to 50 lb per square foot saturated. Intensive systems with 6 or more inches can exceed 80 to 150 lb per square foot. If you are adding more than about 15 to 30 lb per square foot of dead load to an existing slab, deck, or roof, consult a structural engineer. ASTM maintains active standards for vegetative roof systems (E2396, E2397, E2399, etc.) that cover saturated media properties, load guidance, and substrate density for dead-load analysis ASTM Roofing & Vegetative Roof Standards (E2396, E2397, E2399, etc.). This is not optional. Some jurisdictions also require permits for this type of installation.
Step-by-step assembly for sod over concrete
- Verify structural capacity with an engineer and obtain any required permits.
- Clean the slab surface thoroughly; repair cracks and address any standing water low spots.
- Apply a continuous waterproofing membrane rated for vegetated assemblies — this protects the concrete from continuous moisture exposure and root penetration.
- Install a root barrier membrane directly over the waterproofing if roots of your chosen grass species are aggressive (bermudagrass and zoysia qualify).
- Place a drainage mat or geocomposite layer (drainage board with dimpled core) to allow water to escape laterally to drains or edges.
- Lay a geotextile filter fabric over the drainage layer to prevent fine rootzone particles from clogging the drainage board.
- Place engineered lightweight rootzone mix to a minimum depth of 4 inches, targeting 6 inches where structural loads allow. Use expanded shale, expanded clay, pumice, or perlite-blended mixes rather than native topsoil to minimize weight and improve drainage.
- Install edging or retention boards around the perimeter to contain the rootzone.
- Lightly firm the rootzone surface — it should be firm but not hard — and moisten it before sod delivery.
- Lay sod immediately on arrival, staggering seams and rolling lightly to eliminate air gaps.
- Water twice daily for the first two weeks, then taper to once daily through week four.
The concrete-leachate problem you need to plan for
Fresh or exposed concrete can leach alkaline compounds including calcium hydroxide into surrounding soil, raising local pH. Elevated pH locks out iron and manganese, causing yellowing (chlorosis) in your new lawn. If you are working around fresh concrete or using crushed cementitious material as any part of your base, test your rootzone pH before sodding and plan to amend with sulfur to bring it into the 6.0 to 7.0 range most turfgrasses prefer.
Installing sod over gravel or crushed rock
Gravel is actually a useful base for sod when it is managed correctly, it drains well and does not compact the way clay does. The challenge is that gravel by itself has almost no nutrient or moisture retention, so you need a solid topsoil layer above it. This situation is similar to the gravel-base questions covered in guides about whether sod can grow on gravel, and the preparation approach is comparable.
- Grade the gravel surface so it slopes away from any structures at a minimum of 1 to 2 percent grade for drainage.
- Rake out any sharp aggregate over 1.5 inches that could puncture roots or create uneven contact.
- Optional but recommended: lay a geotextile landscape fabric over the gravel before adding soil. This keeps topsoil from migrating down into the gravel voids over time while still allowing water to drain through.
- Place quality topsoil or a topsoil/compost blend to a minimum depth of 4 inches; 6 inches is strongly preferred for long-term root development and drought tolerance.
- Lightly till or rake the top inch of topsoil to create a loose, smooth seedbed surface.
- Moisten the topsoil surface to about 2 to 3 inches depth before laying sod.
- Roll sod lightly after laying to ensure full contact — the gravel base means the soil above it can be slightly looser than normal, so the rolling step is important here.
One thing to watch: if the gravel base has large voids, topsoil can slowly settle and create depressions over the first season. Check for low spots after the first heavy rain and topdress as needed before the lawn fully establishes.
Installing sod on or over rocky ground
Rocky in-ground areas are frustrating but workable. Whether you can grow grass on rocks depends heavily on how much rock versus soil is present and whether roots can find pockets to colonize. If you’re specifically asking 'will sod grow over rocks', the short answer is yes in some situations but it usually requires removing or covering the rock with sufficient topsoil so roots can establish. The approaches below move from least to most intensive. For more detail on whether grass can grow on rocks, see can grass grow on rocks.
Rock removal and topsoil importation
For areas with heavy surface rock coverage, mechanical removal followed by topsoil importation is the most reliable method. Rent a skid steer or rock rake attachment for large areas. Aim to clear rocks down to at least 4 inches depth over the entire sod footprint. Fill cleared areas with quality topsoil to grade, achieving a 4 to 6 inch minimum depth. Compact lightly and finish-grade before sodding.
Soil pockets for patchy rocky areas
If rocks are scattered rather than continuous, you can work topsoil into the gaps between rock outcrops and create connected soil pockets. This works best on slopes where you are also managing erosion. Lay sod over the prepared pockets and use biodegradable erosion control netting on slopes steeper than about 3:1 (horizontal to vertical) to hold the sod in place while it roots.
When to skip sod and seed instead
Very rocky terrain with irregular surfaces is genuinely difficult to sod because the sod mat cannot conform tightly to bumpy ground, leaving constant air gaps. On irregular rocky areas, hydroseeding is often the smarter choice, it gets seed into every crevice and the tackifier in the hydroseed mix provides erosion control during establishment. The result is not as instant as sod, but establishment is more reliable and far less expensive.
Installing sod on hard or compacted ground
Compacted soil is one of the most common reasons sod installations fail, and it is entirely preventable. Hard compacted ground has collapsed pore spaces, meaning water runs off the surface, oxygen cannot reach root zones, and new roots cannot physically push through. Extension guidance and construction specs consistently call for loosening to 4 to 6 inches depth before sodding, and they are right.
Decompaction methods
- Small areas (under 500 sq ft): core aerator or garden fork, working to 4 inches depth across the entire area.
- Medium areas (500–2,000 sq ft): walk-behind core aerator rental, making multiple passes in perpendicular directions.
- Large areas or severe compaction: tractor-mounted subsoiler or deep-tine aerator to reach 6 inches or more.
- After aerating, till or rotovate the top 4 to 6 inches to break up the loosened cores and create a workable seedbed.
Soil amendments for compacted areas
After tilling, check soil texture. Pure clay needs 2 to 3 inches of coarse sand and 1 to 2 inches of compost tilled in to improve drainage and structure. Sandy or sandy-loam soil typically needs only compost at 1 to 2 inches tilled in to improve water retention. Target a finish surface that is firm but yields slightly when pressed, it should not be powdery soft or rock hard. Rake to a smooth grade, roll lightly, moisten to 3 to 4 inches depth, and sod within 24 hours of final prep to prevent the surface from re-drying or forming a crust.
Laying sod on top of existing grass
This question comes up constantly, and the honest answer is that laying sod directly over live, actively growing grass almost always fails. The existing grass acts as a physical barrier between the new sod and the soil, preventing the root contact the sod needs to establish. Within 2 to 4 weeks the new sod yellows, the underlying grass rots, and you end up with a soggy, smelly mess that has to come out anyway. Whether sod actually grows in this scenario and how to prevent failures is a topic worth diving into fully when you are comparing standard sodding methods.
When laying sod over existing turf can work
There are narrow conditions where thin existing turf beneath new sod is acceptable: the existing turf is dormant and essentially dead (killed with herbicide and fully desiccated), or the existing vegetation is so sparse and low that it will decompose quickly without blocking root contact. Even in these cases, scalping the existing turf to ground level and power-raking to remove as much thatch and debris as possible before sodding significantly improves results.
Step-by-step for the right prep
- Apply a non-selective herbicide (glyphosate) to the existing lawn. Wait 7 to 10 days for full kill.
- Confirm complete kill — live grass under new sod is the number one cause of failure in this scenario.
- Scalp the dead turf as low as your mower will go, ideally at 0.5 inches or less.
- Power-rake or dethatch aggressively to remove the dead mat. The goal is near-bare-soil contact.
- Core-aerate the area to relieve any compaction introduced by foot traffic during removal.
- Topdress with 0.5 to 1 inch of quality compost if the surface is thin on organic matter.
- Rake smooth, roll lightly, moisten to 2 to 3 inches depth, and sod immediately.
When seeding or hydroseeding is the better call
If the area in question is large, the budget is tight, or the surface is too irregular for good sod contact, seeding or hydroseeding over properly prepared ground is genuinely a more practical choice. Seeding gives roots the chance to establish naturally from the very beginning rather than fighting through a mat. Hydroseeding adds a tackifier-and-mulch slurry that holds seed in place on slopes and speeds germination. Neither produces the instant visual result of sod, but both often produce stronger, better-rooted turf over a full season.
Materials and tools by surface type
| Surface | Key Materials | Tools Needed | Topsoil/Rootzone Depth |
|---|---|---|---|
| Concrete (engineered) | Waterproofing membrane, root barrier, drainage board, geotextile, lightweight rootzone mix, edging | Trowel, roller, straightedge, irrigation supplies | 4–6 in engineered mix minimum |
| Gravel/crushed rock | Quality topsoil or topsoil-compost blend, geotextile fabric (optional), edging | Rake, plate compactor (light pass), sod roller, garden hose or irrigation | 4–6 in topsoil over graded gravel |
| Rocky in-ground | Imported topsoil, compost, erosion control netting (on slopes) | Skid steer or rock rake, tiller, rake, sod roller | 4–6 in topsoil over cleared substrate |
| Compacted/hard ground | Compost, coarse sand (for clay soils), starter fertilizer | Core aerator, tiller/rotovator, rake, sod roller | Till to 4–6 in; add amendments to match texture needs |
| Over existing grass | Glyphosate herbicide, compost topdress, starter fertilizer | Mower (set low), power rake/dethatcher, core aerator, sod roller | 0.5–1 in compost topdress over treated, raked surface |
Minimum rooting depth: the numbers that matter
For a standard in-ground lawn, the minimum practical rootzone depth for sod is 3 to 4 inches of quality topsoil, with 4 to 6 inches strongly preferred. This range appears consistently across extension research and contractor specifications, and it gives even the shallower-rooted species like Kentucky bluegrass and perennial ryegrass enough depth to survive summer drought stress. Below 3 inches, lawns on any surface become water-dependent to the point of being impractical without daily irrigation.
For rooftop or structural slab installations, the equation shifts. You are balancing rooting depth against structural load. In those scenarios, 4 inches of lightweight engineered rootzone is a practical minimum, and it will support only shallow-rooted grass varieties that accept that constraint. Going below 4 inches on a structural installation produces an unstable lawn that will struggle through any dry stretch. Temporary patch applications, such as a sod strip over a concrete repair area, can function with as little as 2 to 3 inches for a limited period, but this is not a permanent solution.
Irrigation, maintenance, and rooting timelines
Watering is where most sod installations succeed or fail, and the specific surface matters because different bases hold moisture differently. Lightweight rootzone over concrete drains fast and dries out quickly; gravel bases drain aggressively too. Standard in-ground topsoil is more forgiving. Use these schedules as starting points and adjust based on how dry the top inch feels when you probe it each morning.
| Surface / Phase | Watering Frequency | First Mow | Starter Fertilizer | Rooting Timeline |
|---|---|---|---|---|
| All surfaces — Days 1–7 | 2x daily (morning and afternoon), keep sod and top 2 in of soil moist | Do not mow | Apply at install time | Roots beginning to extend |
| All surfaces — Days 8–14 | 1–2x daily depending on heat and drainage | Do not mow until tug test passes | — | Tug test should pass 2–4 weeks |
| Standard topsoil — Weeks 3–6 | Every 2–3 days, watering deeply to 4–6 in | First mow once grass reaches 1/3 above target height | Second light feed at 4–6 weeks | Established enough for light traffic |
| Lightweight rootzone (concrete/gravel) | Every 1–2 days through week 6 — drains faster | Same — wait for tug test, typically week 3–4 | Second light feed at 4–6 weeks | Full establishment 6–10 weeks |
| All surfaces — Fully established | 1x per week deep watering (about 1 inch total) | Regular mow schedule for species | Seasonal fertilization schedule | Full root depth: 3–6 months |
Common failure modes and how to prevent them
- Poor soil contact: the single biggest killer of new sod. Roll immediately after laying on every surface. On gravel or loose rootzone, make two light roller passes in perpendicular directions.
- Compaction after installation: avoid foot traffic on new sod for at least 2 weeks. Use temporary stepping boards if access is needed.
- Drainage failure on concrete or slab installations: blocked or undersized drainage outlets allow water to pool under the rootzone, suffocating roots and degrading waterproofing membranes. Verify that all drains are clear before sodding and after every heavy rain during the first month.
- Alkaline leachate from concrete: causes chlorosis (yellowing) that looks like nitrogen deficiency but does not respond to fertilizer. Test pH before installing; adjust rootzone pH to 6.0–7.0 with sulfur amendments.
- Overwatering: just as damaging as underwatering. Soggy soil displaces oxygen and invites fungal disease. If the soil is already wet when you check in the morning, skip that watering cycle.
- Underwatering during establishment: on fast-draining bases (gravel, lightweight rootzone), the sod mat can dry out within hours on hot days. Touch the surface by late morning — if it feels dry and warm, water immediately.
- Freeze-thaw damage on structural installations: water trapped under rootzone or within drainage boards expands on freezing and can damage membranes and lift the rootzone. Ensure drainage is fully functional heading into cold weather.
- Structural overload: adding saturated soil weight to a roof, deck, or patio without engineering review is a genuine safety hazard, not just a lawn problem.
Best grass types for challenging surfaces
Grass species selection has a real impact on success when rootzone depth is limited or drainage is aggressive. For structural and shallow-rootzone installations, you want species that perform well at 4 to 6 inch root depths and do not demand deep soil resources. For compacted ground and rocky situations, deep-rooting species that can push through resistance pay dividends in drought tolerance once established.
| Situation | Recommended Species | Why It Works |
|---|---|---|
| Shallow rootzone (4–6 in) over concrete or slab | Perennial ryegrass, fine fescue, Kentucky bluegrass (cool season); zoysia (warm season) | Perform well at 6–12 in root depth; zoysia tolerates heat stress and shallow conditions |
| Gravel or fast-draining base | Tall fescue (cool season); bermudagrass (warm season) | Deep-rooting and drought-tolerant once established; handle occasional dry periods better |
| Compacted or hard ground | Tall fescue, Kentucky bluegrass after decompaction (cool); bermudagrass (warm) | Both push through loosened hard soil well; bermudagrass especially vigorous in warm climates |
| Rocky terrain with limited soil pockets | Fine fescue, creeping red fescue | Shallow-rooted tolerant species that adapt to thin, variable soil depth |
| Fast repair/patching on any surface | Perennial ryegrass, turf-type tall fescue blends | Fastest germination and rooting speed among common species; sod roots within 7–14 days reliably |
Avoid Kentucky bluegrass and bentgrass on structural slab installations where rootzone depth cannot exceed 4 inches, both are shallow-rooted but sensitive to heat and drought stress, and a thin rootzone magnifies that weakness significantly.
Practical alternatives to sod on difficult surfaces
Sometimes the honest recommendation is to skip sod entirely. These alternatives are worth considering before committing to an engineered installation.
- Raised planter beds or raised lawn frames: build a contained frame on concrete or a hard surface, fill with engineered rootzone to 6 or more inches, and grow turf inside it. Simpler and cheaper than a full green-roof assembly for small decorative lawn areas.
- Artificial turf: increasingly realistic-looking and genuinely appropriate for rooftop terraces, patios, and high-traffic areas where sod would struggle. Zero irrigation, zero soil weight issues, and no rooting concerns. Higher upfront cost but lower lifetime maintenance.
- Seeded lawn: on gravel, rocky ground, and compacted soil that has been properly prepped, seeding with a quality turf blend gives roots the chance to establish naturally. Slower than sod but often produces a stronger, better-rooted lawn.
- Hydroseeding: ideal for irregular rocky terrain and slopes. The slurry of seed, tackifier, and mulch conforms to uneven surfaces that sod cannot contact properly. Fast germination and built-in erosion control.
- Containerized turf sections: for specific accent areas on concrete — portable turf trays or modular green-roof panels filled with engineered growing medium. Can be moved, replaced, and managed individually.
Should you attempt sod on this surface? A decision checklist
Run through these conditions before committing to a sod installation on a non-standard surface. If you hit any red flag, address it or consider an alternative before proceeding.
- Is there at least 4 inches of penetrable, quality growing medium available for roots? If no: add soil, build up rootzone, or choose an alternative.
- Is drainage adequate — will water move away from the surface within 24 hours after heavy rain? If no: install drainage before sodding.
- For structural surfaces (concrete, slabs, decks, roofs): has a structural engineer confirmed the surface can carry the saturated soil load? If no: do not proceed without engineering review.
- Is the surface pH in the 6.0–7.0 range (especially near fresh or exposed concrete)? If no: amend before sodding.
- Is the existing surface free of live, actively growing vegetation? If no: kill and remove existing turf fully before sodding.
- Is irrigation available or planned for the first 4 to 6 weeks of establishment? If no: plan for hand watering at minimum twice daily or the project will fail.
- Is the installation area in at least 4 to 6 hours of direct sun per day? If no: evaluate shade-tolerant species or consider alternatives, since sod establishment under heavy shade is a separate challenge.
- RED FLAG — Skip sod if: the substrate has no drainage path, the structure cannot be verified for load capacity, the area is under constant shade, or the budget does not include rootzone preparation materials.
Short installation checklist for homeowners and landscapers
Before the job
- Confirm rootzone depth and drainage path for your specific surface.
- Order structural engineering review if installing on any concrete slab, roof, or deck.
- Test soil pH and amend if needed (especially near concrete).
- Order sod delivery to arrive the same day as final surface prep — never leave sod pallets sitting more than 24 hours.
- Gather all materials: topsoil or rootzone mix, compost, starter fertilizer, sod roller rental, irrigation supplies.
Day of installation
- Final-grade and smooth the receiving surface; eliminate depressions larger than 0.5 inches.
- Moisten the surface to 2 to 3 inches depth before sod arrives.
- Lay sod immediately on delivery, staggering seams like brickwork, pressing edges together tightly.
- Roll the entire sodded area with a sod roller to eliminate air gaps.
- Water immediately and thoroughly — the first watering should penetrate through the sod into the top 2 inches of soil below.
Two-week follow-up
- Water twice daily for the first week; adjust to once daily in week two if soil stays moist overnight.
- Perform the tug test at day 14 — gently pull a corner of sod. If it resists, rooting is underway.
- Check edges and seams daily — gaps dry out first and need hand watering or topdressing with a thin layer of soil.
- Avoid foot traffic for at least 2 weeks; 4 weeks preferred.
- Apply second light fertilizer application at 4 to 6 weeks post-installation.
- First mow when grass reaches one-third above its target height, typically 3 to 4 weeks after installation.
Troubleshooting: when things go wrong
- Yellowing after week one: check for overwatering first (probe soil — if wet below 2 inches, reduce frequency). If soil is moist but not waterlogged, test pH — yellowing near concrete often signals alkalinity rather than nitrogen deficiency.
- Sod lifting or failing the tug test at week three: expose a corner and look at the soil interface. If you see dry, powdery soil or a visible air gap, the soil was not moist enough at installation or the sod mat dried out before rooting. Re-lay with increased watering frequency.
- Washouts on slopes or gravel bases: the receiving surface is too smooth or too steep for sod to hold during heavy rain. Pin sod edges with biodegradable landscape staples (6-inch minimum) on any slope steeper than 4:1.
- Persistent bare spots: usually indicate low spots where water pools or high spots that dry out first. Probe the soil — if dry, topdress with 0.25 to 0.5 inches of topsoil and reseed bare patches rather than re-sodding small areas.
- Fungal patches or matted areas: almost always overwatering combined with poor drainage. Reduce watering frequency immediately, improve drainage if possible, and treat with an appropriate fungicide if the issue spreads.
Time, cost, and safety, what to realistically expect
A standard in-ground sod installation on properly prepared compacted or gravel-base soil runs roughly $0.30 to $0.80 per square foot for sod alone, plus $0.50 to $1.50 per square foot for soil prep materials and labor depending on your region and how much amendment work is needed. Add core aerator rental at around $75 to $150 per day, and a sod roller rental at $40 to $80 per day.
A full engineered installation over concrete, waterproofing membrane, root barrier, drainage board, geotextile, and lightweight rootzone, can easily run $8 to $20 or more per square foot installed by a professional, before the sod itself. For rooftop applications with waterproofing concerns, the cost of a structural engineering consultation ($300 to $800 typically) is genuinely worthwhile given the liability exposure of getting it wrong.
Safety considerations are not just about the grass. Working on concrete roof structures or elevated decks introduces fall risk; always use appropriate personal protective equipment and have a second person present for elevated work. Permit requirements vary by jurisdiction for permanent structural modifications, check with your local building department before installing any permanent rootzone system on a slab or roof.
Next steps and related guidance worth consulting
If you are still uncertain about the soil conditions under your planned sod area, the most productive next step is a basic soil test, they cost $15 to $30 through most cooperative extension offices and tell you pH, organic matter, and nutrient levels so you can amend precisely rather than guessing. For drainage problems on any of the surfaces covered here, addressing the drainage before sodding is always the right sequence. For areas that are partially or fully shaded, shade tolerance of your chosen grass species deserves its own research pass before you invest in installation.
If you are working through related questions, like whether sod can grow on gravel, whether it can establish on rocky ground, or what actually makes sod succeed or fail in general, those topics share most of the same root biology and soil-prep principles covered here. For a concise answer to the specific question 'Does sod grow?' see our short FAQ titled "Does sod grow" for a direct explanation. The decision points differ mainly in the amount of site engineering required. And if you have landed here because a previous sod attempt failed, the most common culprit across all surfaces is the same: insufficient soil depth or poor soil contact at install time. Start there, fix it, and the grass will follow.
FAQ
Can sod grow on concrete?
Short answer: Not directly. Sod needs a penetrable, moist growing medium for roots to establish. Plain concrete provides no usable soil or drainage, so sod placed directly on concrete will survive only briefly using the thin soil attached to the harvested sod and will quickly fail unless an engineered rootzone or sufficient topsoil (and drainage/waterproofing) is provided above the slab.
Feasibility verdicts for common surfaces (concrete, gravel, rocks, compacted/hard ground, sod over existing grass)
Concrete: Possible only if you build an engineered rootzone/green‑roof assembly (waterproofing, drainage layer, filter fabric, 3–6+ in engineered soil) and check structural load. Gravel/rocks: Possible if you remove or stabilize rock and provide ≥3–6 in of topsoil/engineered mix; thin gravel layers are insufficient. Compacted/hard ground: Usually fixable—decompact/till 4–6 in, add amended topsoil (3–6 in) and grade. Sod-on-top-of-existing‑grass: Not recommended—sod needs direct soil contact; remove/kill existing turf or cut/back existing grass, loosen topsoil and place sod for good contact. In all cases, sufficient rooting depth, moisture, and drainage are required.
Why sod needs soil contact — basic biology of establishment
Sod survives initially on its own moisture and the thin attached harvest soil, but long‑term survival requires new roots to grow into the underlying medium. Roots need a moist, aerated, penetrable medium with nutrients and oxygen. Air gaps or impermeable layers block root penetration; poor drainage or waterlogging suffocates roots; alkaline leachate from concrete can cause nutrient deficiencies. Proper contact and a suitable rootzone allow roots to anchor, access water and nutrients, and regain vigor.
Minimum rooting depth and recommended rootzone depth for sod
Minimum short‑term: factory sod is harvested with ~1/4–1/2 in of soil but this is inadequate for long term. For successful establishment on poor substrates you should provide at least 3–4 in of quality topsoil/engineered rootzone; 4–6 in is preferred for home lawns. For long‑term turf health under normal use, plan for species’ mature rooting depths (e.g., cool‑season grasses 6–12 in or more; tall fescue 18–48 in) but these depths reflect long‑term rooting into deeper soils, not the installation minimum.
Step‑by‑step: installing sod over concrete (flat slab or roof)
1) Consult a structural engineer if adding soil/planting media over a building, deck or elevated slab—calculate saturated dead load. 2) Ensure slab waterproofing and root barrier are intact; repair as needed. 3) Install protection board, drainage composite/mat, and filter fabric per manufacturer. 4) Place engineered lightweight rootzone (green‑roof mix) to required depth (minimum 3–4 in; 4–6 in preferred for turf; use lightweight aggregates to reduce weight). 5) Grade smooth, moisten the rootzone, and lay sod with tight seams. 6) Lightly roll to eliminate air pockets and ensure soil–sod contact. 7) Water immediately and follow a frequent, shallow watering schedule until roots penetrate (see irrigation schedule). 8) Monitor drainage, membrane condition, and plant health; adjust irrigation and fertilization as directed.
Step‑by‑step: installing sod over gravel or rocks
Next Articles
Can Sod Grow on Hard Ground? How to Fix Hard Dirt
Can sod grow on hard ground? Fix compaction and fill dirt with grading, soil amendments, proper prep, and aftercare.
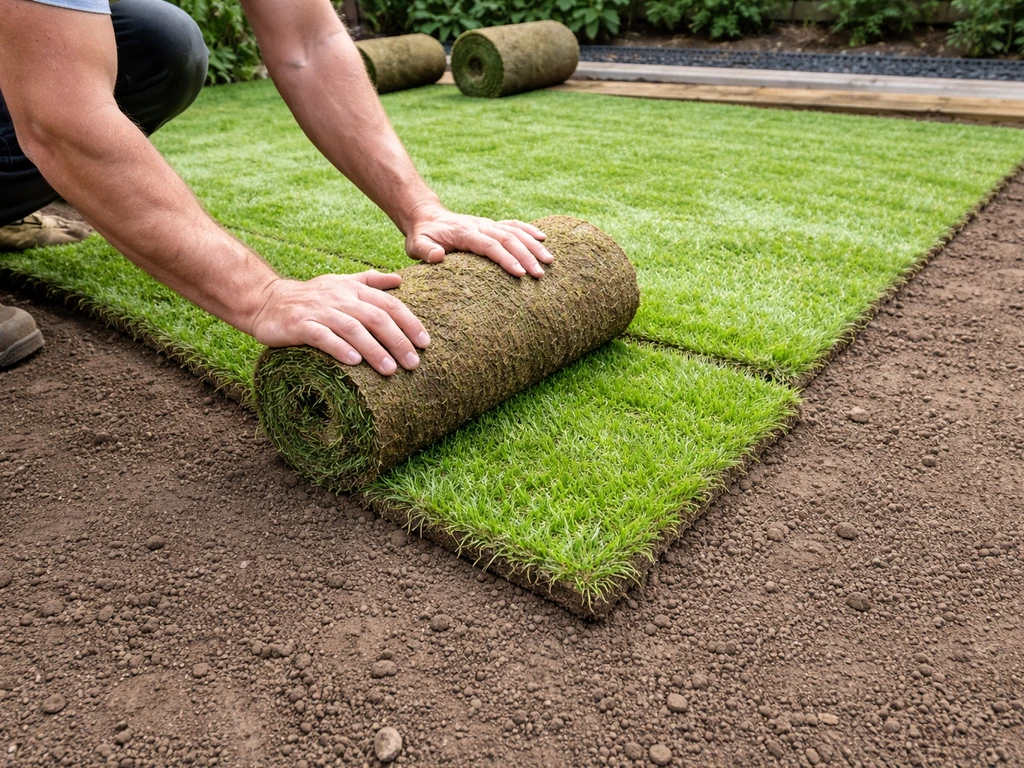
Will Sod Grow on Gravel? How to Make It Work or Choose Alternatives
Yes, but only with a soil layer over gravel. Learn prep, required depth, installation steps, and care to prevent failure
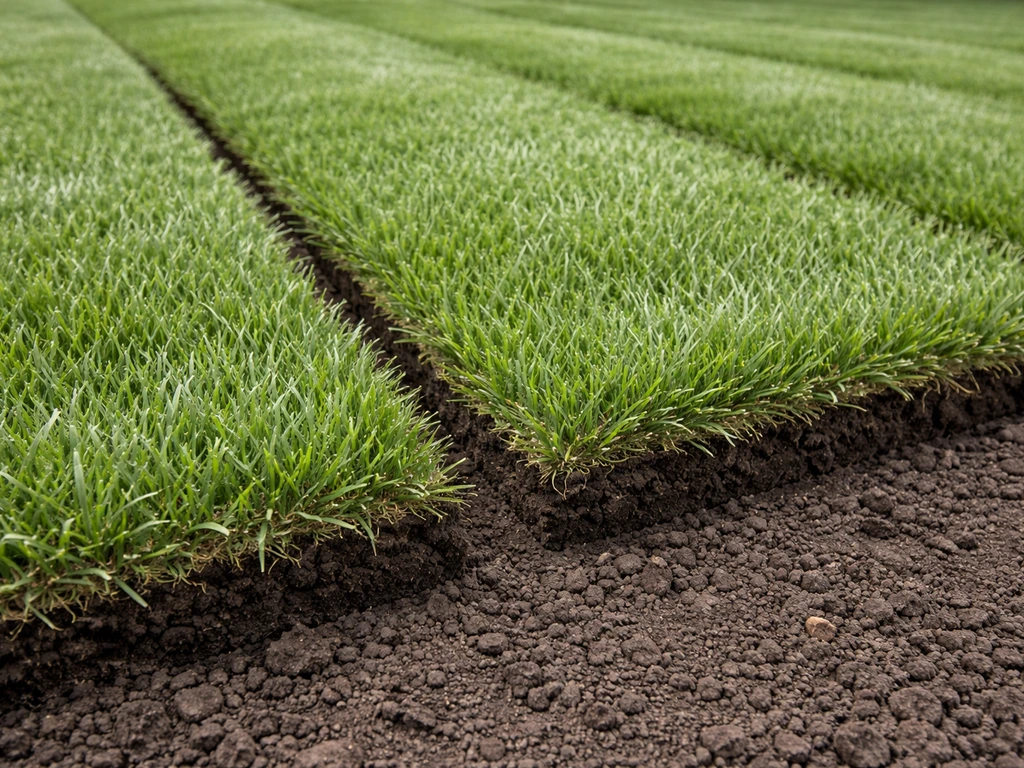
Does Sod Grow? How Sod Grass Takes Root and Establishes
Learn how sod grass roots and grows after install, timelines, watering and mowing, plus fixes for shade, sand, and poor