Yes, sod grows, but not quite in the way most people picture it. It is also a common question whether can sod grow on top of grass when your existing lawn is already there, so compare that situation to the rooting and soil-contact steps described here. The grass blades you see on day one are already alive and growing. The real question is whether the roots will knit into your soil, because that's what separates a lawn that thrives from one that dies off in patches three weeks later. Here's exactly what to expect, what to watch for, and what to do if things go sideways.
Does Sod Grow? How Sod Grass Takes Root and Establishes

Marcus Volkmann
21 Apr 2026
What sod actually is (and what 'growing' means after you lay it)
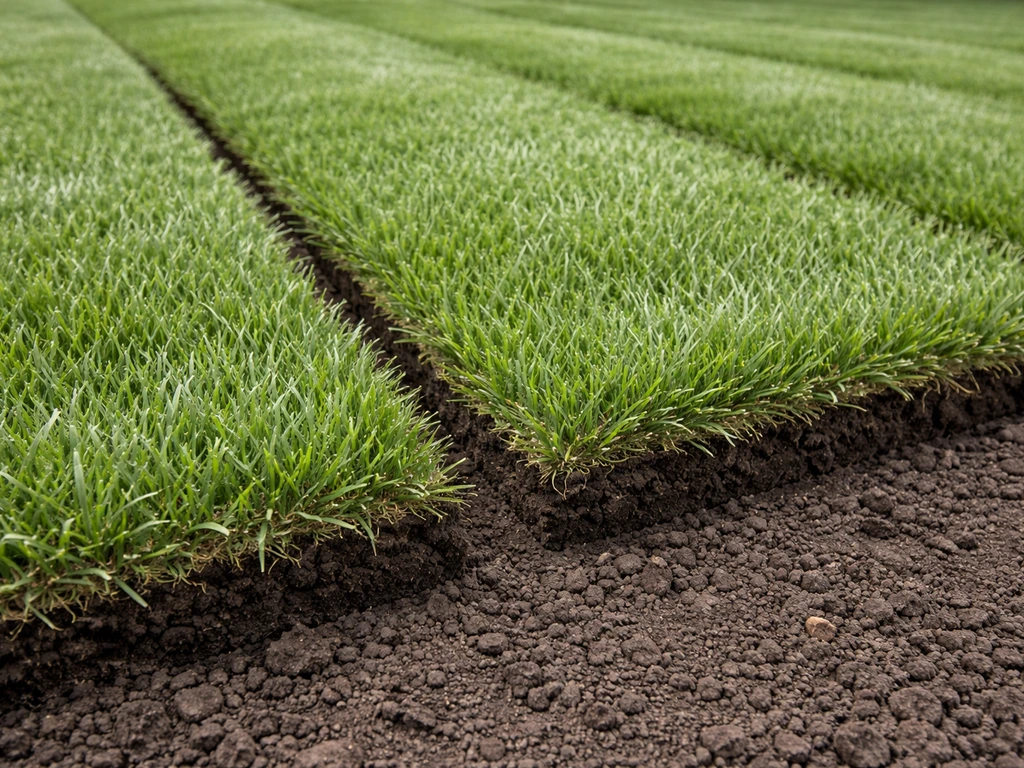
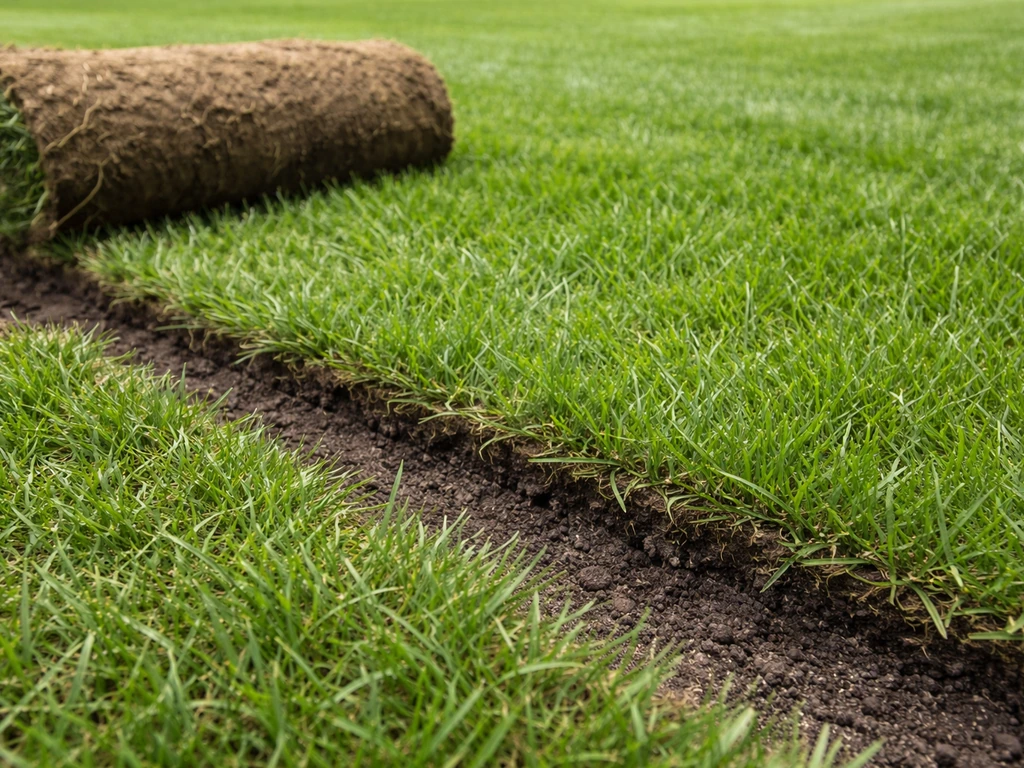
Sod is a pre-grown layer of turfgrass that includes the grass plants, their root system, and a thin layer of soil all harvested together as a cohesive mat. When you unroll it and lay it down, you're not planting seeds and waiting for something to sprout. The grass is already there, already photosynthesizing, and already doing its job above ground. What has to happen next is a two-part process: the existing root system has to recover from the stress of being cut and transported, and new roots have to grow downward into your native soil.
So when people ask 'does sod grow like grass?' the honest answer is: it is grass, and yes it grows like grass, but the establishment phase is its own thing. You're not watching for germination. You're watching for rooting, and those are completely different signals to look for.
How sod roots vs how grass grown from seed grows
When you grow grass from seed, the whole process starts from zero. A seed germinates, puts out a tiny root, then shoots up a blade. Everything has to build from scratch, which is why seeded lawns take weeks to show any cover at all. Sod skips that entirely. The grass is mature, the crown is intact, and you get instant visual coverage.
The rooting process with sod is about re-anchoring, not starting fresh. The harvested roots are alive but stressed. Over the first 10 to 14 days, those roots push outward and downward into your soil. Grasses like Kentucky bluegrass also spread via underground rhizomes, which help the sod knit into surrounding soil over time, filling gaps and thickening the stand. Once those roots grab hold, you've got an established lawn. Until then, the sod is essentially sitting on top of your yard, held in place mostly by gravity and moisture.
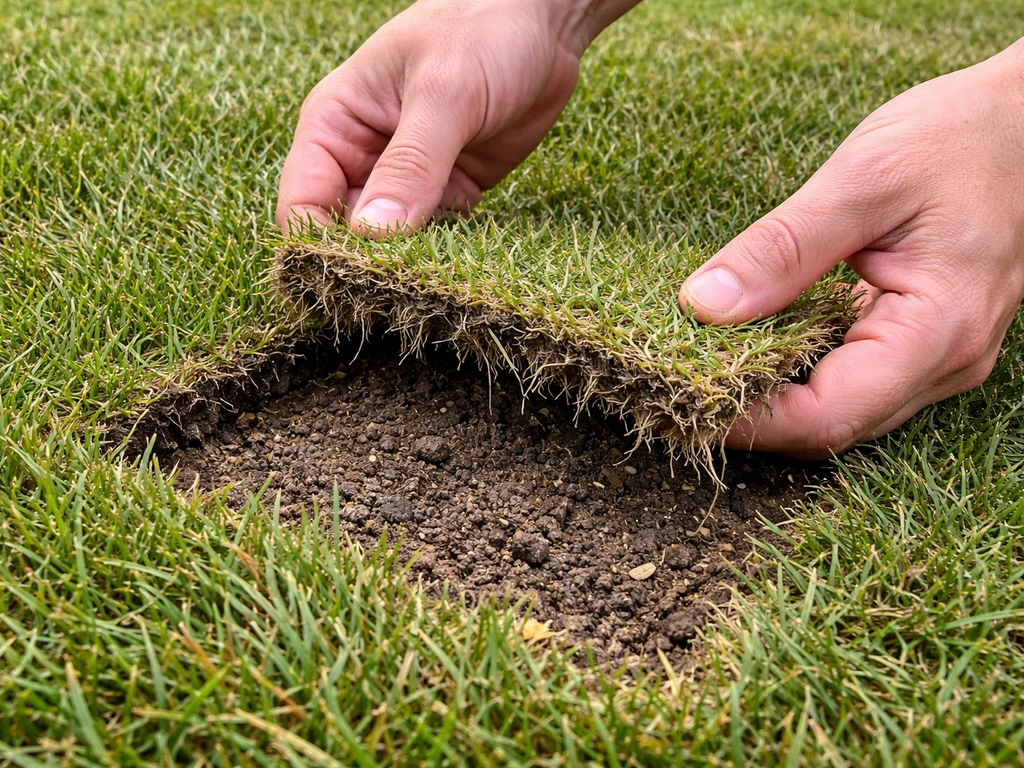
This is also why sod-soil contact matters so much. If there's any air gap between the bottom of the sod mat and the soil beneath it, roots can't bridge that gap efficiently, moisture doesn't transfer properly, and the sod dries out and dies in that spot. Think of it like a wound that won't heal if the bandage isn't pressed flat.
Signs sod is taking root vs signs it's failing

The most reliable test is the tug test. After about 10 to 14 days, grab a corner of the sod and pull upward gently. If it resists and feels anchored, you're in good shape. If it lifts like a rug, rooting is behind schedule. Do this in multiple spots around the lawn, not just one, because sod can root unevenly depending on shade, soil variation, or irrigation coverage.
Here's what good establishment looks like in the first few weeks, and what should raise a flag:
| Timeframe | Signs It's Working | Signs It's Struggling |
|---|---|---|
| Days 1–3 | Grass blades are upright and green, soil beneath is moist | Edges curling up, sod feels spongy or soggy, yellowing begins |
| Days 4–7 | Color stays consistent, no shrinkage or gaps opening up | Gaps forming between strips, brown patches appearing, visible wilting |
| Days 10–14 | Tug test shows firm resistance in most areas | Sod lifts easily, roots are sparse or absent underneath |
| Weeks 3–4 | New leaf growth visible, lawn filling in, normal green color | Large dead patches, persistent yellowing, sod mat coming loose |
Yellowing in the first couple of days is normal, especially at seams or edges. That's stress from the harvest and transport. It usually greens back up once roots get moisture from below. Sustained yellowing past day five or six, though, is a signal that something is off, usually watering or poor soil contact.
Watering, mowing, and timing for fastest establishment
Watering schedule that actually works
Your first watering is the most important one you'll do. You need to soak through the sod mat and wet the top 1 to 2 inches of native soil below it. That typically takes about an inch of water. Get this wrong and the roots have nothing to reach for. After that first soak, water once or twice a day for the first 7 to 10 days to keep the sod and the soil surface consistently moist without creating standing water or saturation. If conditions are hot, windy, or your soil is sandy and drains fast, you may need to water up to three or four times a day in short cycles.
Once the tug test confirms rooting at the 10 to 14 day mark, start tapering back. The goal shifts from keeping the surface moist to encouraging deeper root growth, which means less frequent but deeper watering. Target 4 to 6 inches of soil depth when you water at this stage. Roots follow moisture, so if you keep the top inch wet all the time, that's where the roots will stay.
When to mow for the first time
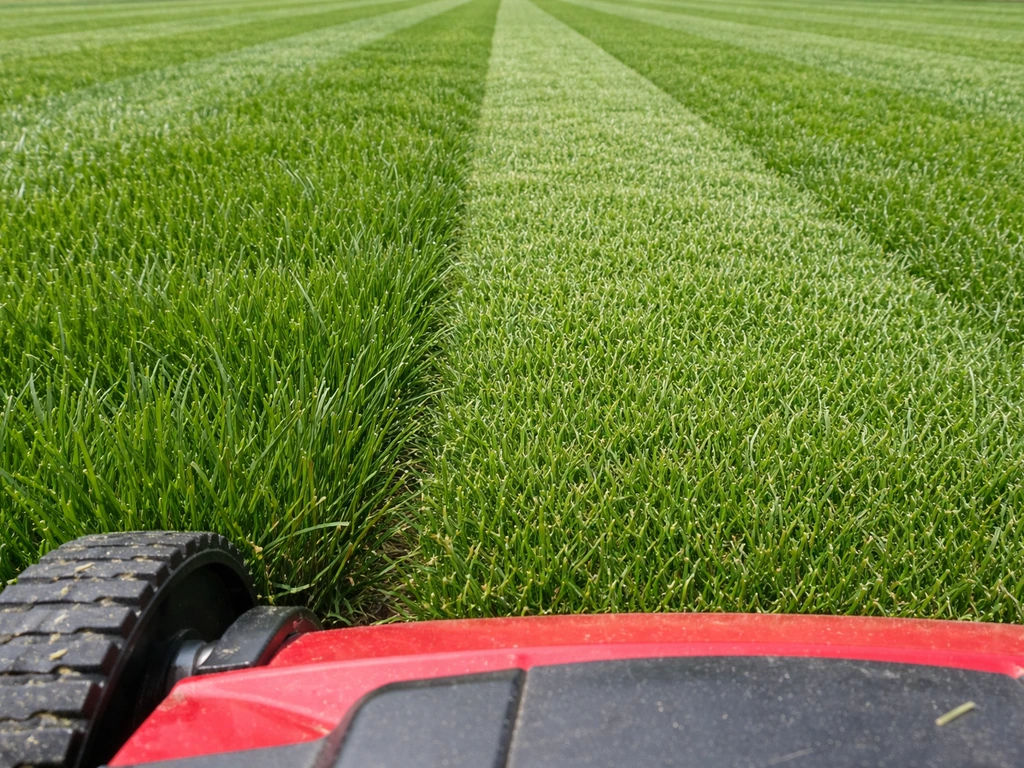
Don't rush the first mow. The sod needs to be firmly rooted before you run a mower over it, or you'll shred the root connections you've been building. A general rule is to wait about 2 to 3 weeks, but the real signal is the tug test, not the calendar. The soil also needs to be firm enough that you and the mower won't sink in and leave ruts. If the ground feels soft and you leave footprints, wait another few days. When you do mow, don't take off more than one-third of the blade height at once.
Best time of year to install
For cool-season grasses like Kentucky bluegrass or fescue, the sweet spot is when soil temperatures are above 50°F and air temperatures are in the 65 to 75°F range. That's typically early fall or spring. Summer installations can work but demand much more aggressive watering because heat stress compounds the transplant stress. Sod installed when soil is frozen won't root at all, so late-fall installs are risky unless you're in a mild climate where the soil stays workable. Warm-season grasses like Bermuda or Zoysia want warmer conditions and do best in late spring through early summer.
Soil prep and amendments when your ground isn't ideal
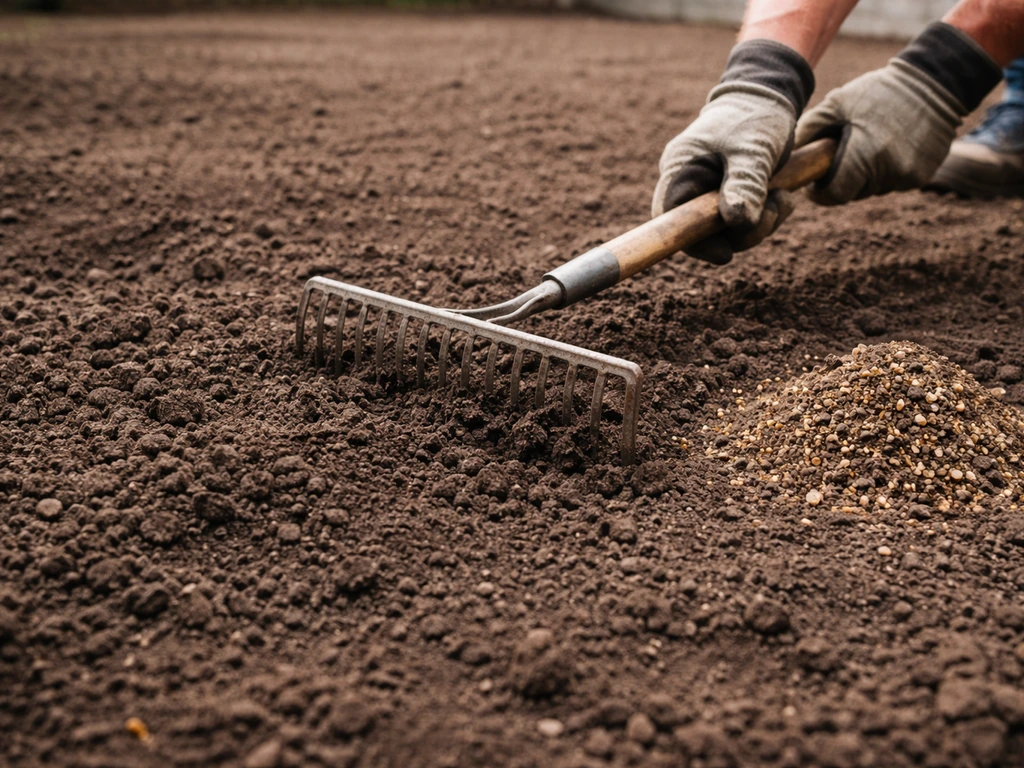
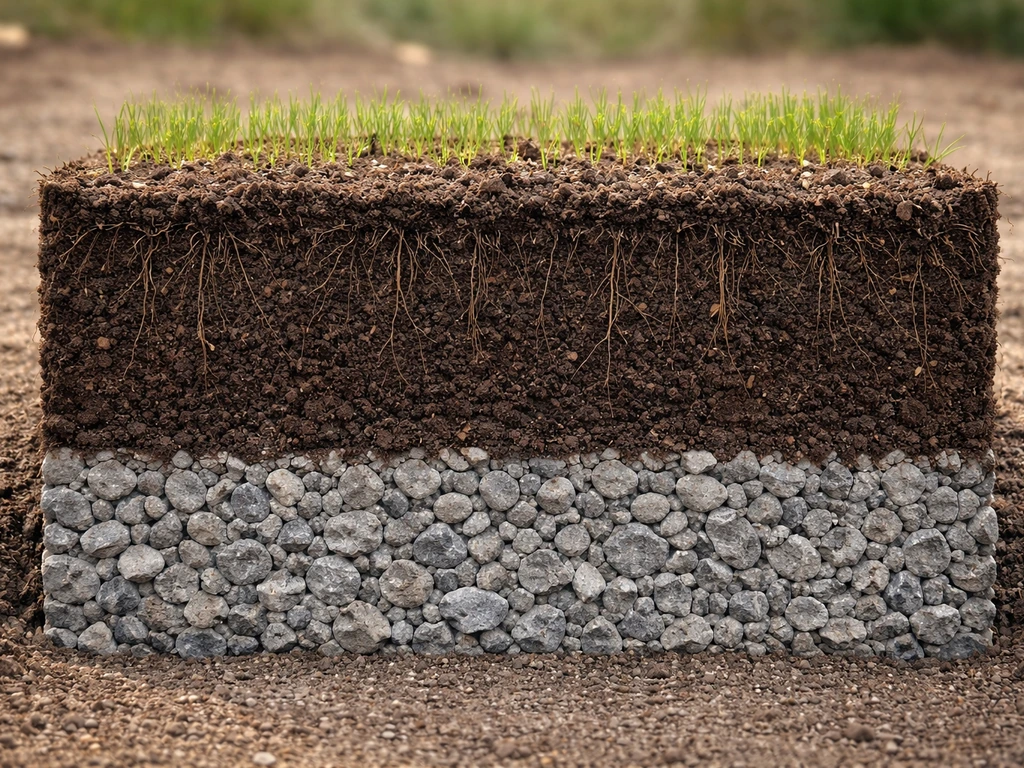
This is where most DIY sod installs fail. People focus on the sod and skip the prep. Sod needs a rootable base, meaning loose, moist soil that new roots can penetrate easily. If your ground is compacted, has a pH problem, or is mostly sand, you need to address that before the sod arrives. Do not wait until after installation.
Start with a soil test if you haven't done one. Cool-season turfgrasses generally do best at a soil pH of 6.0 to 7.2, with Kentucky bluegrass preferring the 6.5 to 7.2 range specifically. If you're below that, lime brings the pH up. If you're above it, sulfur brings it down. Getting pH right is one of the highest-leverage things you can do because it affects how well roots absorb nutrients, even if everything else is perfect.
For compacted soil, till or aerate the top 4 to 6 inches before laying sod. Compacted ground is like concrete to a new root tip. Adding compost worked into the top layer improves both drainage in clay soils and water retention in sandy soils. Speaking of sand: if you're installing over a mostly sandy base, roots will establish but the sod will dry out extremely fast. Mixing in compost or a quality topsoil blend at a depth of 3 to 4 inches makes a big difference in how long moisture stays available. Sandy substrates are a topic worth understanding on their own if that's your situation.
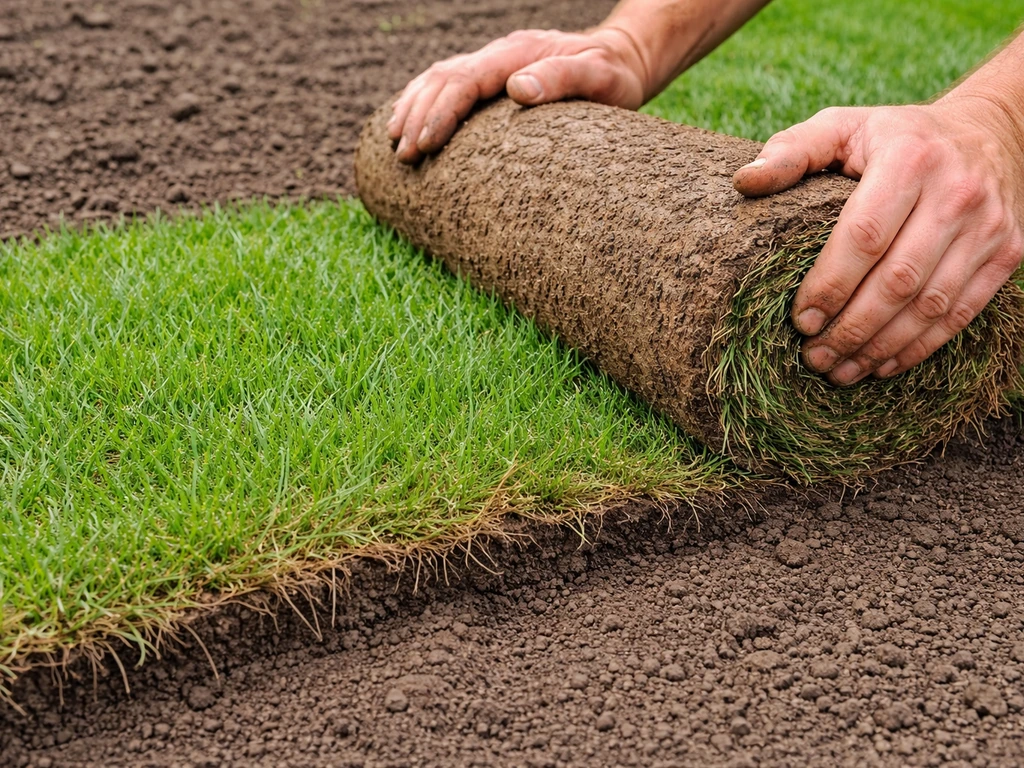
After prep, use a roller filled about one-third with water to press the sod firmly against the soil. This closes any air gaps and is one of the simplest steps people skip. It takes 20 minutes and it matters a lot.
On the harder end of the spectrum, sod simply will not root on truly impenetrable surfaces. If you're dealing with can sod grow on hard ground, the key takeaway is that truly impenetrable surfaces prevent roots from re-anchoring properly without adding a rootable base. If you're dealing with rocks or other hard spots, you may need extra soil build-up or base preparation so the sod can root into something rootable will sod grow over rocks.
If you are wondering can grass grow on rocks, the key issue is whether roots can find a rootable base to re-anchor into. If you've ever wondered whether sod can grow on hard ground, concrete, gravel, or over rocks, the short answer is no without significant intervention, because there's no soil matrix for the roots to grow into.
Related to that same rooting question, can sod grow on concrete is another hard-surface scenario where roots need something soil-like to re-anchoring into will sod grow on gravel. If you are wondering, can you still get turf to take, this is closely related to the question will sod grow on gravel, which depends on having enough soil for roots to re-anchoring into. Those scenarios require a different approach entirely.
How shade, sun, and temperature affect sod growth
Full sun is the easiest environment to establish sod in, assuming watering is handled correctly. The grass photosynthesizes actively, root growth is strong, and you'll hit your tug-test milestones on schedule. Problems start when you push sod into conditions it wasn't bred for.
Heavy shade slows everything down. The grass blades are producing less energy, which means less fuel available for root development. If you're laying sod under dense tree canopy, expect rooting to take longer, and expect you'll need to match the sod species to the shade level. Fine fescues are among the best options for shaded areas. Kentucky bluegrass, one of the most common sod varieties, needs at least 4 to 6 hours of sun and will thin out and struggle in deep shade no matter how well you prepare the soil.
Temperature matters more underground than above it. Soil temperature drives root activity. Once soil temps drop below 50°F, rooting slows to a crawl. Above 85°F in the soil, cool-season grasses go into stress and shut down active growth. This is why late-summer sod installs are the hardest to pull off: the sod looks okay on top but the soil is too warm for aggressive rooting, and then a heat wave hits and you're watching it die while you water constantly.
Also worth noting: trees aren't just a shade problem. Tree roots compete aggressively for water and nutrients, which can starve newly installed sod even in a well-irrigated yard. If you're laying sod near large trees, you'll need to water more frequently and may want to fertilize at the 4 to 6 week mark once rooting is confirmed.
Troubleshooting common sod install mistakes
The most common reasons sod fails
- Poor soil contact: skipping the roller or laying sod over rough, uneven ground leaves air gaps that dry out roots fast
- Underwatering in the first week: the single most common mistake; sod looks fine until it suddenly doesn't, usually around day 5 to 7
- Overwatering to the point of saturation: soggy soil suffocates roots and promotes fungal issues like brown patch
- Mowing too early: pulling up root connections before they're set, especially on soft ground
- Installing in the wrong season: sod laid when soil is frozen or when temperatures are extreme will fail regardless of everything else
- Laying sod on compacted or heavily clay soil without any prep: roots can't penetrate and the lawn never fully establishes
- Letting sod sit rolled up too long before installation: sod starts dying within 24 to 48 hours of harvest if it's hot out; install it the day it arrives
What to do if your sod is failing right now
- Check the tug test in multiple spots to confirm whether the problem is widespread or isolated to specific areas
- Lift a failing section and look at the underside: are there any new white root tips? If yes, it's rooting but slowly. If the roots look brown and dead, that section is gone
- Check soil moisture at 1 to 2 inches below the sod by pushing a screwdriver into the ground. It should slide in with moderate pressure. Too hard means dry, too easy means saturated
- For isolated dead patches under 12 inches across, replace the section with a new piece of sod cut to fit, press firmly, and water consistently
- For large areas of failure, assess whether the soil prep was adequate. If the soil is compacted or has a pH problem, you'll need to strip, amend, and re-sod rather than hoping a second layer takes
- If rooting is just slow due to cool weather, be patient and keep the moisture consistent. Sod can root in cool conditions as long as the soil isn't frozen
- If the species choice is wrong for the environment (for example, sun-loving Bermuda in a shaded yard), no amount of care will fix it. Reseed or re-sod with a shade-tolerant variety
The good news is that most sod problems are fixable if you catch them in the first two weeks. After a month, the lawn is either established or it isn't, and at that point you're looking at reseeding dead patches or pulling up sections and starting over. Act fast, use the tug test as your checkpoint, and don't wait for a problem to become obvious before you investigate.
FAQ
How long does sod need before it actually “takes,” not just looks alive?
Sod usually establishes fastest when installed on a cool, workable day and kept consistently moist for the first 10 to 14 days. If the sod dries out before it is laid, the roots can die quickly, even if the grass blades look green. To avoid this, lay it the same day, keep it shaded if there’s a delay, and never let seams or edges sit uncovered and dry.
What if my sod is green but I’m worried it isn’t rooting?
Yes, sod can look green while rooting is failing. A stronger signal is the tug test resistance after about 10 to 14 days, plus checking a small corner where you can gently lift to see whether roots have penetrated into your native soil. If roots are still mostly within the sod mat, you need to adjust moisture and sod-soil contact, not just add fertilizer.
Is yellowing after installation always normal, and how do I tell it apart from a problem?
The early yellowing that comes from harvest and seams usually improves once moisture reaches below the mat and roots resume growth. If yellow areas are concentrated in dry seams, edges, or low spots, it often points to inconsistent watering or poor contact. If the entire lawn is uniformly yellow and stays that way past day five or six, think about watering depth, base firmness, or installation timing rather than “slow nutrition.”
When should I fertilize newly installed sod?
Feed is not the fix for poor establishment. In most cases, postpone fertilizer until rooting is confirmed (around the 4 to 6 week mark, especially near large trees). If you fertilize too early, you can burn tender tissue and encourage shallow growth, which makes the lawn more vulnerable during the first heat wave.
Can I mow right away after laying sod?
You should avoid mowing until the turf is anchored, generally confirmed by a firm tug test. When you do mow, raise the blades slightly and remove no more than one-third of the height, and avoid mowing when the ground is soft (ruts mean the mat hasn’t knit). Mowing too early can tear developing roots and turn a “fixable early issue” into a permanent patch.
How much should I water sod in the first week, and what’s the most common watering mistake?
Watering frequency alone isn’t the goal, water depth is. A common mistake is frequent light sprinkling that keeps the top inch wet but never wets the soil 1 to 2 inches below the mat, so roots won’t reach down. Use your irrigation cycle to target that first deep soak, then shift to fewer cycles that still maintain consistent moisture without pooling.
Is it okay if the lawn gets soft underfoot, and when can I let people use it?
It’s not automatically a problem if there’s some footprint after walking, but ruts or sinking show the ground is still too soft for traffic and mowing. Also avoid heavy foot traffic near seams, because that can create air gaps and slow rooting. If you must work on the lawn, place boards temporarily to distribute weight.
Can I install sod in late fall or winter, and what should I watch for?
If you suspect winter risk, the key is soil workability and soil temperature, not just air temperature. For cool-season sod, rooting slows dramatically when soil temps drop below about 50°F, so late-fall installs can stall. If your area routinely freezes, plan either for an earlier window or for added protection (like keeping watering appropriate to weather) so the mat doesn’t sit frozen and unrooted.
What do I do if sod edges or seams won’t root?
If sod lifts easily, you likely have inadequate contact or insufficient moisture to help roots bridge an air gap. Start by checking low points and seams, then verify that your first watering soaked through the mat and into the top 1 to 2 inches of your soil. If the base is compacted or rocky, spot-fixes may not work well, and you may need to lift and re-prep those sections.
How does installing sod near trees change the plan?
Overhanging trees can keep soil cooler, but the bigger issue is water competition from tree roots. Near large trees, you often need more frequent irrigation than in open sun zones, and you may need to plan for eventual fertilization once rooting is confirmed because the lawn is fighting for nutrients. Also expect slower tug-test timing in dense shade.
Will sod work on mostly sandy soil, and how do I stop it from drying out?
If your yard has sandy soil, sod can establish but still fail during heat because it dries out fast. The fix is deeper, consistent moisture early and improving the base by blending in quality compost or topsoil into the rootable depth (often 3 to 4 inches) before installation. Without that, you may be forced into short, frequent watering for weeks.
What if my yard has rocks, gravel, or concrete, can sod still take?
If there are truly impenetrable areas (like smooth concrete, thick compacted gravel, or large layers of rock), sod cannot reliably re-anchor and will fail. The practical approach is to create a rootable base by removing the barrier material or building up a soil layer to allow roots to penetrate and knit. If only small rock pockets exist, targeted soil build-up is usually more effective than trying to “hope it takes.”
Next Articles
Can Sod Grow on Top of Grass? What to Do for Success
Find out if sod can grow over existing grass and get step-by-step prep, when to avoid it, and best alternatives.
Can You Grow Grass Over Gravel? How to Do It Right
Learn when you can grow grass over gravel and follow a step-by-step method for soil depth, drainage, seeding or sod, and

Do Wood Chips Help Grass Grow? When They Work and When Not
Learn when wood chips help grass grow, when they steal nitrogen, and step-by-step how much to apply and seed options.