Grass won't grow in your backyard for one of a handful of very specific reasons: too much shade, compacted or waterlogged soil, the wrong grass species for your climate, a pH problem, pest damage, or physical barriers like construction fill buried just under the surface. Fix the underlying cause first, and grass will usually grow. Skip the diagnosis and just reseed, and you'll be back in the same spot next season wondering what went wrong again.
Grass Will Not Grow in Backyard? Step-by-Step Fixes & Alternatives
Marcus Volkmann
18 Jul 2026
Who deals with this and what this guide covers
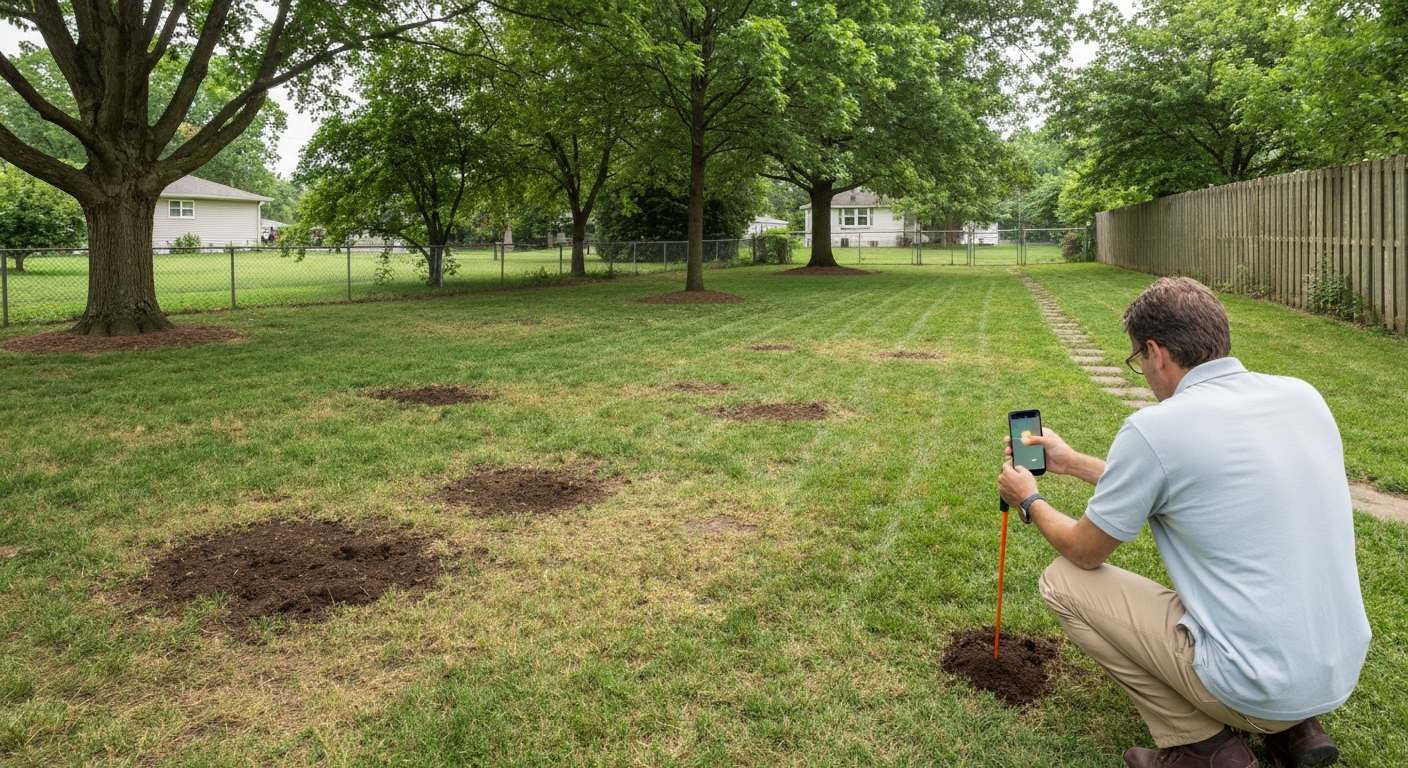
This problem hits homeowners in older neighborhoods with big established trees, new-build properties where the topsoil was scraped away during construction, yards with heavy foot traffic or pets, and anyone whose backyard sits in a low spot that holds water. Landscapers deal with it constantly on renovation jobs. Gardeners converting lawn edges often discover their soil is a compacted, pH-wrong mess. This guide walks you through a structured diagnosis first (because that's where most people skip), then specific remediation steps covering soil, shade, drainage, compaction, pests, planting choices, and realistic alternatives when grass genuinely isn't the right answer.
Quick diagnostic checklist before you do anything else
Before spending money on seed, sod, or amendments, run through this checklist. Every item takes less than 15 minutes and will point you toward the right fix.
- Count sun hours on a typical summer day at the problem spot (use a phone sun-tracker app or just observe hourly from 8 a.m. to 6 p.m.)
- Look for a pattern: is failure along the tree dripline, in a low spot, near the fence, or spread across the whole yard?
- Push a screwdriver or pen into the soil — if it won't go past 2 inches without serious force, compaction is likely a factor
- After rain, check whether water pools for more than a few hours in the bare area
- Dig a 1-square-foot patch to 3 inches and look for white C-shaped grubs (more than 4-6 per square foot is a problem)
- Check if animals have been digging — skunks and raccoons dig when grub populations are high
- Look at the bare soil color and texture: red or orange streaking suggests drainage issues; very sandy or very clay-heavy soil will need amendment
- Note whether any grass grows at all, or if there's a specific patch shape (circles often mean disease; irregular bare strips often mean shade or traffic)
Step-by-step diagnosis: the tests to run
Once you've done the visual survey, run through these tests in order. Each one either confirms or rules out a root cause, and the sequence matters because some fixes (like seeding) are pointless if drainage or pH aren't addressed first.
1. Sunlight mapping
Do this on a full-leaf summer day, not in winter or early spring when trees are bare. Track direct sun hours at multiple spots across the problem area. This is the step most people skip, and it explains a huge portion of backyard failures. Extensions consistently flag this as the first question to answer because no soil fix will help if the light isn't there.
2. Soil test (pH, nutrients, organic matter)
Collect 10 to 15 soil cores from across the problem area, pull them from 2 to 4 inches deep, remove any thatch or surface debris, mix them together in a clean bucket, and send that composite sample to your state's land-grant extension soil lab. Most labs charge between $15 and $30 and will return results for pH, available phosphorus and potassium, organic matter percentage, and cation exchange capacity. They'll also give you specific lime or fertilizer rate recommendations tied to your actual numbers, which is more reliable than any generic rule of thumb.
3. Compaction test
A soil penetrometer is the proper tool here. If you don't have one, the screwdriver test gives a reasonable field estimate. Extensions including Rutgers NJAES use 300 psi as a practical threshold: when penetrometer resistance exceeds 300 psi within the top 2 to 4 inches, roots physically cannot push through. Note the depth at which resistance becomes very high, because that determines whether basic core aeration can reach the problem layer or whether you need more aggressive mechanical options.
4. Drainage and infiltration test
Dig a hole about 12 inches deep and 12 inches wide in the problem area. Fill it with water, let it drain completely, refill it, and time how long it takes to empty. A healthy lawn soil drains at roughly 0.5 to 2 inches per hour. If your hole still has standing water after 3 to 4 hours, drainage is a serious problem. If water sits for 24 hours or more, you're dealing with either a hardpan layer, a high clay content that needs major amendment, or a site-level drainage issue that needs regrading or subsurface drainage.
5. Salinity check
This matters most if you're near a road that gets salted in winter, near a coastal area, or using recycled or well water for irrigation. Electrical conductivity (EC) measures soluble salt concentration in soil. Soil with ECe above 4 dS/m is classified as saline and will suppress or kill most turf. Your extension soil lab can measure EC, or you can buy an inexpensive EC meter for field readings. Salt-tolerant species like Bermudagrass and some Zoysia varieties handle higher EC than Kentucky bluegrass or fine fescues.
6. Pest and disease inspection
For grubs, pull 3 to 4 one-square-foot sections of turf to about 3 inches deep in the bare or thinning areas. Count white C-shaped larvae per square foot. A home lawn can generally tolerate 4 to 6 grubs per square foot before significant damage happens, but if you're regularly above that threshold the grubs are a real contributor. For disease, look for circular or ring-shaped patterns, discolored crowns, and any fungal webbing or slime at the soil surface. Disease is more common in lawns with poor airflow, heavy thatch, or that stay wet overnight.
How to run simple field tests and read the results
Jar drainage test (texture and settling)
Fill a mason jar about one-third with soil from 3 to 4 inches deep, add water to fill it, shake it hard for a minute, then let it settle for 24 to 48 hours. Sand settles to the bottom within minutes. Silt settles after an hour or two. Clay stays suspended and settles last, leaving a cloudy layer on top. The relative thickness of each layer tells you your soil texture. Heavy clay at the top layer (more than 40% of the settled column) explains both drainage problems and compaction tendency. Very little silt or clay with almost pure sand means low water and nutrient retention.
Ribbon test (clay content quick check)
Moisten a golf-ball-sized piece of soil until it's workable but not wet, then squeeze it between your thumb and forefinger and push it out into a ribbon. If it forms a ribbon longer than 2 inches before breaking, you have a significant clay content. This matters because clay soils compact easily, drain poorly, and need more aggressive aeration and organic matter to support turf.
pH test kits
A basic pH test kit from a garden center works fine for a ballpark reading. Add a soil sample to the provided solution, shake, and match the color to the chart. For turf, you're looking for pH in the 6.0 to 7.0 range. Most turf does best between 6.0 and 6.5. Readings below 5.5 or above 7.5 reliably suppress nutrient availability and grass growth regardless of how much fertilizer you apply. Send a full lab sample for precise rates, but the field test tells you quickly whether pH is even on the table as a factor.
Visual pest and disease ID
For grubs: white, C-shaped larvae with a brown head capsule, found in the top 2 to 4 inches of soil. For sod webworm: small brown moths flying up when you walk across the lawn at dusk; caterpillars found near the soil surface in thatch. For dollar spot disease: small silver-dollar-sized sunken patches that may merge into larger dead areas; look for white cottony mycelium in early morning. For brown patch: irregular brown areas with a darker water-soaked outer ring; most common during hot humid nights.
What your results mean: recovery or start over?
Once you have data from the tests above, you can make a real decision rather than guessing. Use this framework:
| Problem Found | Severity | Recommended Path |
|---|---|---|
| Low sunlight (under 2 hrs direct) | High | Switch to shade-tolerant species or groundcover/alternative |
| Low sunlight (2–4 hrs direct) | Moderate | Try fine fescue or shade-tolerant tall fescue; prune trees to open canopy |
| pH below 5.5 or above 7.5 | High | Amend with lime or sulfur per lab recs, wait 2–3 months, then reseed |
| Compaction >300 psi at surface | High | Core aerate or deep-rip before any seeding; may need 1–2 seasons |
| Drainage under 0.5 in/hr | High | Regrade, add subsurface drainage or heavily amend rootzone |
| Grubs >4–6 per sq ft | High | Treat before reseeding; seed after pest pressure drops |
| EC above 4 dS/m | High | Leach salts with clean water, improve drainage, or choose salt-tolerant species |
| Thin but existing grass | Low-Moderate | Overseed with better-matched species after basic soil prep |
| Construction fill / buried debris | Very High | Remove fill, add 4–6 inches quality topsoil, or consider hardscape alternative |
The honest version: if more than two of these problems show up at the same time, you're almost certainly looking at a full renovation rather than a patch job. A struggling lawn on compacted, poorly draining, low-pH soil under heavy shade is not a seeding problem. It's a site problem, and treating it like a seeding problem is how people spend three seasons and $500 getting nowhere.
Fixing your soil: aeration, topdressing, and organic matter
Soil remediation is the least glamorous part of lawn repair and the most important. Seeding on bad soil is like painting over rot. These are the actual fixes, not the marketing version.
Core aeration
Use a hollow-tine aerator that pulls plugs 0.5 to 0.75 inches in diameter and 2 to 3 inches deep. Solid-tine aerators (spikes) aren't adequate for compacted soil because they push soil sideways and can actually worsen compaction around each hole. Timing matters a lot: for cool-season grasses, early fall is best (September in most northern climates); for warm-season grasses, do it in late spring after full green-up. Aim for cores every 2 to 3 inches across the whole area. Leave the plugs on the surface to break down. For heavily compacted areas, run the aerator in two directions. Most home lawns benefit from annual aeration; high-traffic areas or clay-heavy sites may need it twice per season.
Topdressing
Apply a thin layer of compost, quality topsoil, or a compost-sand mix after aeration while the holes are open. Quarter-inch to half-inch topdressing per application is the practical limit without smothering existing grass. Work it lightly into the aeration holes with the back of a rake. Repeated annual topdressing gradually improves soil structure in a way that single-event amendments don't. For severely depleted soil, you may need to bring in 4 to 6 inches of quality topsoil before seeding rather than trying to improve what's there.
Adding organic matter
Organic matter is the single best long-term soil improvement for both clay-heavy and sandy soils. It improves drainage in clay, water retention in sand, microbial activity in both, and provides slow-release nutrients. The most practical approach for existing lawns is compost topdressing after aeration. For a full renovation, rototilling in 2 to 4 inches of compost before seeding or sodding makes a meaningful structural difference. Organic matter percentage below 2% in your soil test results is a red flag worth addressing before any seeding effort.
Getting pH and nutrients right
The sweet spot for most turf is pH 6.0 to 7.0, with 6.0 to 6.5 being the range where nutrient availability is most consistent. Below pH 5.5, aluminum and manganese can reach levels that are toxic to roots. Above pH 7.5, iron, manganese, and some micronutrients become unavailable even if they're present in the soil, which is why grass on high-pH soils often looks yellowed and thin no matter how much fertilizer you apply.
Raising pH with lime
If your lab test shows pH below 6.0 and recommends lime, use calcitic or dolomitic ground limestone and apply at the rate your lab specifies. Don't just apply a bag and hope. The rate needed depends on your current pH, your target pH, and your soil's buffering capacity (CEC), which the lab measures for you. Lime takes 2 to 3 months to meaningfully shift pH in the rooting zone, so apply it well ahead of a planned seeding date. Fall application before spring seeding is a sensible schedule.
Lowering pH with sulfur
If pH is too high (above 7.0 to 7.5), elemental sulfur acidifies soil over time as soil bacteria convert it to sulfuric acid. It works slowly, typically 3 to 6 months for meaningful change. Aluminum sulfate works faster but can create toxicity issues at high application rates. Again, use your lab's specific recommendations rather than guessing. Repeatedly applying sulfur without testing is how people overshoot in the other direction.
Nutrient deficits
Your soil test will flag phosphorus and potassium as low, optimum, or high with suggested rates. Phosphorus is critical for root establishment during seeding or sodding. Potassium supports stress tolerance and drought resistance. Nitrogen doesn't show up usefully on a soil test because it moves through the system quickly, but starter fertilizers with phosphorus are standard practice for any seeding or sodding project. Follow the lab's categorical recommendations: low phosphorus almost always means applying it before seeding; optimum levels mean you don't need to add more and doing so won't help.
Fixing compaction and hard ground
Compaction is one of the most common reasons grass fails year after year even in backyards that seem otherwise reasonable. The soil physically prevents rooting, and shallow roots mean the grass desiccates during dry spells and dies off in high-traffic areas.
When core aeration is enough
If the penetrometer shows high resistance starting at 3 to 4 inches down, standard hollow-tine core aeration (reaching 2 to 3 inches) will help but may not fully break the problem layer. In this case, repeat core aeration twice a year for 2 to 3 years while building organic matter with topdressing. This gradual approach works for most suburban lawns with moderate compaction from normal use.
When you need deeper mechanical decompaction
If the compaction layer is at or below 4 to 6 inches, or if you're dealing with a genuine hardpan from construction activity or clay subsoil, core aeration won't reach deep enough. This is where mechanical subsoiling or deep-tine aeration (some machines reach 6 to 12 inches) comes in. Subsoiling with a rented tractor attachment or hiring a landscaper with deep-tine equipment is a one-time investment that makes a permanent difference. I've seen backyards that were complete write-offs for grass turn around completely after a single pass with a subsoiler and a follow-up with compost. This is also closely related to the challenge of trying to grow grass in ground that's too hard overall, which is a separate problem worth understanding fully if you suspect a structural soil issue.
Traffic management and reducing future compaction
If foot traffic or pets are the ongoing source of compaction, you have to address that pattern or you'll be re-aerating every year with diminishing returns. Practical options include installing stepping stone paths through high-traffic routes, creating designated play areas with a more durable surface or a wear-tolerant species, using temporary fencing to rotate rest periods across sections of the lawn, and choosing species for those areas with stronger wear tolerance (tall fescue, Bermudagrass in warm climates). Grass that gets pulverized daily by kids or dogs needs either a different species or a layout change, not just more fertilizer.
Choosing the right grass species for your situation
A lot of grass failure comes down to using the wrong species for the site. This is probably the most common mistake after soil neglect. Here's how species stack up on the factors that matter most in problem backyards:
| Species | Climate | Min. Sun Hours | Shade Tolerance | Compaction Tolerance | Salt Tolerance | Drought Tolerance |
|---|---|---|---|---|---|---|
| Bermudagrass | Warm | 6–8+ | Poor | Good | Moderate-High | High |
| Zoysia (some cultivars) | Warm/Transition | 4–6 | Moderate | Good | Moderate | High |
| St. Augustine (shade cultivars) | Warm/Coastal | 4–5 | Good | Poor | Moderate | Moderate |
| Tall Fescue (turf-type) | Cool/Transition | 4–6 | Moderate-Good | Moderate | Low-Moderate | Moderate |
| Fine Fescue (creeping red, chewings) | Cool | 2–4 | Excellent | Poor | Low | Moderate |
| Kentucky Bluegrass | Cool | 6+ | Poor | Moderate | Low | Low-Moderate |
| Perennial Ryegrass | Cool | 5–6 | Moderate | Moderate | Low | Low |
If you're in a cool-climate backyard with moderate to heavy shade, fine fescue mixes (creeping red fescue, chewings fescue, hard fescue) are consistently the best performers. They genuinely grow in conditions where Kentucky bluegrass and perennial ryegrass just quit. In warm climates with difficult shade, certain St. Augustine cultivars like Palmetto or Seville handle 4 to 5 hours better than Bermudagrass can handle anything under 6. See Selecting the Right Grass, USGA for guidance that Bermudagrass typically needs about 6–8 hours of direct sun and that St. Augustine and some Zoysia cultivars tolerate lower light (around 4–5 hours) Selecting the Right Grass — USGA. If shade is below 2 hours of direct sun per day, no turfgrass species will give you a reliable stand, and alternatives are a better answer.
Seeding, sodding, and plugs: timing and method
Even with the right species and good soil prep, wrong timing kills establishment. Cool-season grasses seed best in early fall (late August to mid-October in most northern U.S. regions) because soil is warm, air temperatures are cooling, and fall rains reduce irrigation demands. Spring seeding works but competes with weed pressure and heat stress. Warm-season grasses establish from seed, sod, or plugs in late spring to early summer (after soil reaches 65 to 70 degrees F consistently) and need the full warm season to root before winter.
Seed vs. sod vs. plugs
Seed is cheapest and gives the widest species and cultivar choice, but requires 3 to 6 weeks for germination and several months for a usable stand. Keep seedbed moist (light watering 2 to 3 times daily) until germination, then taper to deeper, less frequent watering. Sod gives an instant surface but is 5 to 10 times the cost of seed, requires good soil prep underneath to root properly, and limits species options to what's locally available. Plugs are a middle option for warm-season species: lower cost than sod, faster establishment than seed, spaced 6 to 12 inches apart and filled in over one growing season. For bare-dirt renovation in a problem backyard, sod on properly amended soil usually outperforms seeding in terms of weed competition and erosion during establishment.
Establishment and ongoing maintenance
The first 60 days after seeding or sodding determine whether the work pays off. New seed needs consistent moisture at the surface, which usually means light irrigation twice daily until germination. Don't let a new seedbed dry out completely even once during germination. New sod needs daily watering for the first 2 weeks, then taper to every other day, then shift to a normal deep-watering schedule once roots penetrate. Avoid foot traffic on new seedings for at least 6 to 8 weeks. First mowing of new seedings should happen when the grass reaches about 3 to 4 inches, cutting to the upper third rule.
For ongoing maintenance, the single highest-value practice is mowing height. Keeping cool-season grass at 3 to 4 inches (not the 1.5-inch scalp most people default to) dramatically improves shade tolerance, root depth, drought resistance, and weed suppression. Warm-season grasses vary by species, but Bermudagrass cut at 1 to 2 inches and Zoysia at 1.5 to 2 inches maintains good density. Low mowing on shaded or stressed turf accelerates thinning. Fertilize based on soil test results, not on a generic schedule.
When grass genuinely won't work: realistic alternatives
Some backyards are not going to support turf in a meaningful way, and it's more honest and more cost-effective to acknowledge that than to spend years fighting it. For more on options when turf won't work, read to the land where grass doesn t grow (resource 0c3db89e-37df-48a5-a3e3-ad3788cdbfc5). For local examples and resources on establishing turf in challenging sites, see medina has to grow lawn. For more on recognizing when you simply can t grow grass and picking realistic alternatives, see the can t grow grass guide. Heavy shade under a dense canopy with less than 2 hours of sun, heavy clay with a high water table, chronic pet or traffic damage in tight spaces, or soil contamination from construction debris or salt accumulation can all put grass outside the realistic range of outcomes. For a quick cultural note, see grass doesn't grow on a busy street meaning for the proverb's explanation about places where plants, or efforts, can't thrive due to constant disturbance.
Groundcover plants
Native groundcovers like pachysandra, wild ginger, creeping Jenny, and various sedge species (especially Carex pensylvanica in shade) handle conditions that turf can't. They need establishment care in the first season but are generally low-maintenance afterward. They're not walk-on surfaces, so they work better for areas you look at rather than use heavily.
Mulched beds and hardscaping
Under trees with deep root competition and heavy shade, mulched beds of 2 to 3 inches of wood chip or shredded bark are genuinely the better choice. They protect tree roots, suppress weeds, conserve moisture, and look intentional rather than like a failed lawn. For high-traffic zones (backyard games areas, heavily used paths), gravel, decomposed granite, pavers, or poured surfaces eliminate the maintenance and failure cycle entirely.
Artificial turf
Modern artificial turf is a reasonable option for small, heavily used areas where nothing grows, particularly pet runs or play zones. It requires proper drainage preparation underneath and does get hot in direct sun. Installation costs typically run $8 to $20 per square foot professionally installed. It's not a whole-backyard solution for most situations, but for a 10 by 20-foot patch under a deck or in a dog run, it solves the problem permanently.
Timelines and cost reality
Here's what to actually expect from each approach, from quickest to most involved:
| Action | Time to Results | DIY Cost (1,000 sq ft) | Notes |
|---|---|---|---|
| Overseed with better-matched species | 3–6 months | $30–$80 | Only works if soil issues are minor |
| Core aeration + topdressing + overseed | 1 season | $100–$250 | Rent aerator or hire out; best fall timing for cool-season |
| Soil amendment + full renovation seeding | 1–2 seasons | $200–$500 | Includes soil test, lime/sulfur, compost, seed |
| Sod installation (soil-prepped) | 4–8 weeks to usable surface | $500–$1,200 | Excludes pro labor; prep work is critical |
| Deep-tine aeration or subsoiling (hire out) | 1–2 seasons post-treatment | $200–$600 | One-time; for serious hardpan or compaction |
| Drainage fix (regrade or French drain) | 1 season post-install | $300–$2,000+ | Higher end for subsurface French drain installs |
| Groundcover / mulch bed conversion | 1 season to establish | $100–$300 | Long-term low-maintenance option in shade |
| Artificial turf | Immediate post-install | $800–$2,000 for small zone | Permanent; best for high-traffic or pet zones |
When to bring in a professional
Most of the diagnosis and remediation in this guide is genuinely DIY-able with rented equipment and a soil test. But there are points where professional help pays for itself. If your soil test reveals complex problems (very high or very low pH, saline soil, contamination from construction fill), a lawn care professional or extension specialist can interpret results in your specific regional context. If compaction is severe enough to require subsoiling or deep-tine equipment, renting or hiring is usually cheaper than buying. If you're dealing with repeated disease cycles or pest outbreaks that don't respond to threshold-based treatment, a licensed agronomist or turfgrass specialist can identify the actual pathogen or insect and recommend the correct control rather than having you go through multiple products. And if the whole backyard project starts touching drainage, grading, or structural decisions about hardscape, a landscape contractor is worth the cost of a consultation at minimum.
FAQ
Why won’t grass grow in my backyard—what are the most common causes?
Common causes: too little direct sunlight (shade), soil compaction or a hardpan, poor drainage/perched water, unsuitable grass species for your climate or light, incorrect planting timing or method, poor or contaminated substrate (construction fill, high sand, salinity), soil chemical problems (pH, nutrient imbalances), pests (white grubs, chinch bugs), diseases, and heavy traffic or pet damage.
What step‑by‑step diagnostic checklist should I follow to find the problem areas?
1) Walk the yard and map sun hours (record representative spots on a summer day). 2) Visually note patterns: tree driplines, low spots, bare patches, pet/traffic routes, and animal diggings. 3) Take a composite soil test (10–15 cores, 2–4 in depth) for pH, salt (EC), P, K, organic matter. 4) Use a penetrometer or screwdriver at several points to check compaction/resistance and note depth where resistance spikes. 5) Do an infiltration/percolation or simple ponding test in low spots. 6) Sample for pests: lift 1 ft2 sod squares in damaged patches and count grubs/larvae. 7) Inspect for disease signs (mold, thinning, roots rotted). 8) If irrigating, test irrigation water EC/SAR. 9) Record photos and results to compare fixes and timelines.
How do I map sun and why does it matter?
Record direct sun hours at representative locations during full leaf‑out (summer). Many turf species require minimum direct sun (e.g., Bermudagrass ~6–8+ hrs; many St. Augustine or fine/ tall fescues tolerate 3–5 hrs). Match species and planting strategy to measured light rather than assumptions.
How should I collect a soil sample for testing and what lab results matter?
Collect 10–15 cores per management area at 2–4 in depth, mix into a composite, remove thatch, and send to your state extension or reputable lab. Key results: pH, soluble salts (EC), available P & K, organic matter, and CEC. Follow the lab’s lime/fertilizer recommendations rather than generic rates.
What pH range is ideal and how do I correct pH problems?
Ideal turf pH generally 6.0–7.0 (many extensions accept 5.5–6.5). If pH is low (acidic) apply lime per lab rate to raise pH; if pH is high (alkaline) apply elemental sulfur or acidifying amendments per lab recommendations. Corrections take months to fully adjust—follow lab rates and re‑test after one season.
How do I test for soil salinity and what if salts are high?
Labs report electrical conductivity (EC). ECe >4 dS/m indicates saline soils; compare measured EC to species tolerance tables. Remediation: improve drainage, leach salts with low‑salinity irrigation (if possible), use salt‑tolerant turf species or alternatives, and amend rootzone organic matter. Complete salt leaching may be slow and costly.
Next Articles
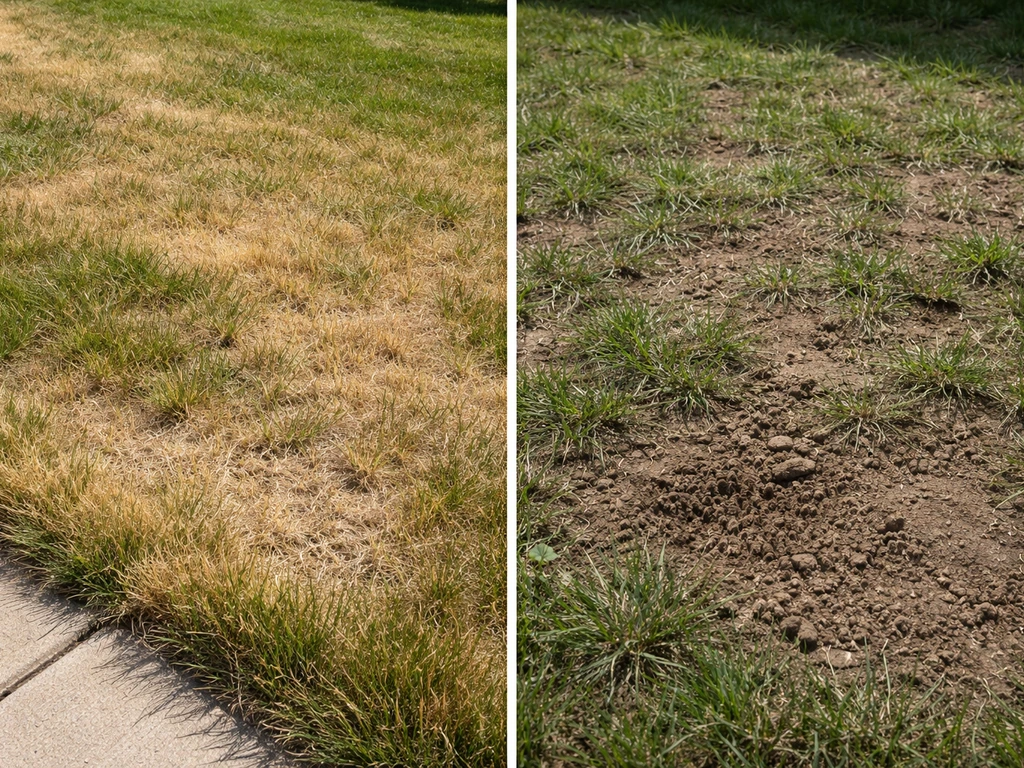
Can’t Grow Grass: Fix Sun, Soil, Water, and Seed Issues
Diagnose why grass won’t grow and fix sun, soil, drainage, pH, watering, and seed contact with step-by-step solutions.
Why Grass Won’t Grow and What to Do on Hard Sites
Diagnose why grass won’t grow in drought, shade, bad soil or hard ground, then get steps, species and alternatives.
Grass Doesn’t Grow on a Busy Street Meaning and Fixes
Meaning of grass doesn’t grow on a busy street and fixes for traffic, compacted soil, salt, shade, heat, and setup.